I will remove suspense: two of the three master cylinders are all toast, victims of corrosion. The rest of the assembly is in pretty decent shape — nothing that a little paint remover, sanding, wire-brushing, and painting can’t take care of.
The master cylinders were a bit of a blow, though. Since they needed replacement, I wondered if I should just upgrade the brakes entirely to the 4.2 setup, since it was apparently more reliable and responsive. I decided not to upgrade; we’ll keep this one more or less as it rolled off the line.
I went ahead and ordered a clutch master cylinder as soon as I took the old one apart enough to see the mess it was inside. I ordered it from Terry’s Jaguar and it arrived a couple of days later, in fact much sooner than I had expected. It is very nearly identical to the original. I decided to take a look at the other master cylinders for the brakes before ordering replacements. One has already been resleeved in brass, and it was bright and shiny without a score mark. The plunger and various innards need attention, though. The other one seemed never to have been touched and was much worse off. Although much of the inside of the cylinder was clean, there were score marks concentrated in one area. It needs either replacement or resleeving. I emailed Terry’s Jaguar to see if they do resleeving and to see whether the metal internals are included in the master cylinder kits. Jerome replied that they don’t resleeve and the kits include only the rubber seals and the “dust cover.” So, at this point, I think I can use a master cylinder rebuild kit for the good, already resleeved master cylinder. I will simply cannabalize the best metal internals from the two cylinders. I’ll probably go with a new master cylinder for the other.
The pedal assembly itself consists of an aluminum housing that holds both the brake and the clutch pedals, and the housing also accepts the clutch master cylinder as well. A bent steel attachment sits next to the aluminum housing and serves to encase the brake pedal linkages (which are quite complex) and hold the twin brake master cylinders. The steel attachment is painted with “hammered” grey paint. Adjacent to the firewall and attached to the aluminum housing is a plate that holds the Dunlop vacuum brake assist bellows. This bellows set up was fairly short-lived in the history of the E-type, since it barely survived the 3.8 liter engine version of the car. The bellows themselves were manufactured by Dunlop, and the whole arrangement has been characterized as somewhat unconventional. But I have to admit that it seems pretty straight-forward, even though the 4.2 setup (from Lockheed, I think) is said to have provided about 40% better assistance with braking. The bellows system does appear not to be as scrupulously backed up and redundant as the 4.2 brakes. I considered upgrading to the newer system, which was carried over through the remaining history of the E-type, more or less intact, if I recall right. But I decided the pedal and braking installation was too visible to replace. I’d look at it and think it was too much of a compromise from the old 3.8 Series I.
I put the clutch/brake pedal assembly into place just for the sake of taking a picture. I figured that the work that was still to come would be easier at the bench than hunched over the car.
That work involves fitting the master cylinders, once they’re ready. The clutch master cylinder from Terry’s is already where it should be, though it remains unattached to the pedal. That installation is no big deal, but the redoing of the complex brake pedal linkages is another matter. I removed the linkages intact, and then subsequently disassembled them for cleaning and renewal. (Nylon bushes need replacing mainly.) When I was removing the crud and the rust, I ran into yellow chromate finish. I recall that being mentioned in relation to the brakes, and so I’m going to do a yellow chromate finish on the linkage. Then it’s a matter of completely assembling and installing the whole part on the car. I think that will get done sometime between now and March. Getting the linkages set correctly to the cylinders might be a bit of a challenge. There is one adjustable “fork” on a push rod that is supposed to be set. I won’t attempt that until there’s actually fluid in the lines, of course.
There is another pedal, too; and it isn’t something to overlook: the accelerator. That was a simple and easy matter of cleaning up the pedal assembly and beginning the cleanup of the throttle linkages, one of which is visible in the picture. I’ve kept the linkages and the pivots raw steel. I waxed them to give them some protection from the elements, and I’ll try to keep them protected in the garage, too. The steering rod goes through the front end of the throttle pedal housing, and the interior of the car is protected from exposure with a rubber “gaiter” that’s fitted to the pedal housing. It is an elegant solution to getting steering into the car. I think it’s these little things that add up to a form of art that the E-type embodies: elegant use of space. (At least in this little detail!)
Of course, the “upper” steering column — the one inside the car — was set into place back in October, but the front section of the steering needed restoration. This includes the “rack and pinion” steering assembly that is attached to the “picture frame” and connects to the suspension pieces. Although all of the rubber parts on the steering assembly were trash, the rest of the parts were in good shape. I had to replace the mounting brackets (a “Metalastic” rubber-and-metal assembly) as well, since the originals were a bit cracked and stiff. The tie rod ends, with their ball joints, were in good shape and had no evidence of bad wear or rust. The toothed rack was pure uncorroded steel. The tie rods themselves were in good shape, and the separated from the tie rod ends with a little effort, some penetrating oil, and some tapping with a hammer. Even though the previous owners of the car repaired rust poorly, they seemed to know how to keep things greased up. I think the grease spared the steering from rusting.
The tube that houses the rack and the pinion had been painted body color, and this paint protected much of it from rust. The aluminum fitting was also protected. I suppose that there is some merit to sloppy paint jobs — at least the previous paint job spared me from too much additional rust repair or part replacement in the steering assembly. I did have to replace the mounting brackets, since they were more exposed to the elements and are made up of rubber fused sandwich-style between steel parts. When I took off the original brackets, I completely destroyed a threaded post that fits through the picture frame. The nut was fused on with rust, and no amount of penetrating fluid would help to loosen it.
I did not replace the bearings in the lower or the upper universal joints. They felt quite smooth, and in case they fail getting to them is hardly a difficult thing. They don’t seem to be too stressed at any point, and so I think the original ones are going to be just fine. The ball joint pins on the tie rod ends can’t be attached until the torsion bars are in place and the hub and wheel assembly is up from its lowest position. Since the tie rod ends do have ball joints, it’s probably a good idea not to stress them too much so that you don’t risk distorting the housings for the ball joints. If that occurs, you pretty much have to replace the tie rod ends. There is one brass bush in the tube holding the steering shaft. That was in good shape, and I left it alone. It’s located at the end opposite the housing for the pinion gear. I don’t think it gets much wear as long as the steering shaft is well greased.
Color scheme on this assembly is simple. You only spray gloss black. I used pictures from Classic Jaguar as a guide, but it looks to me like you can shoot black where it feels right. The extremities, so to speak, stay clear unpainted steel. As with other exposed steel parts, I waxed the pieces to give them some protection. I should note that I am using anti-seize grease on many of the threaded connections, in part of keep them protected from rust but also to keep them manueverable should I want to remove them in the future. I do not think that the anti-seize makes the bolts and nuts any more susceptible to getting loose — except, of course, when you want to loosen them!
The front suspension waited since the basic installation of the bearings, brake rotors, and wheel hubs. I hadn’t done much of anything to the torsion bars, since the prospect of actually setting them up just exhausted me. But with work proceeding on the steering column and the rack and pinion setup, I decided it was time to do the front suspension pieces a bit more permanently. This entailed setting the torsion bars (Oh, joy!) and putting the steering rack and tie rod assembly into place. I also fitted the shock absorbers. So, the only part that is not in place yet is the brake assembly. I figured that I would hold off on the front brakes until I can see the status of the rear brakes, which accept the Dunlop brake slave cylinders, as I understand it. (Classic Jaguar frequently fits the front brakes on the rear and then replaces the fronts with higher grade brakes.) That way, I should be able to get the rear suspension done and installed before I have to make a decision on the front brakes. If I fit the front brakes on the rear, I can also avoid doing a lot more nickle plating right away, though of course there are parts in the rear that will require plating. At this point I might just do the plating in one fell swoop in any case — it’s not an important decision at this point.
Adjusting the torsion bars was not as bad as I had anticipated, though it wasn’t a piece of cake either. The key at this point is to bring the tension on the bars to zero, so that means loosening the upper ball joint pin and not having any of the other tension-causing connections in place either. The steering tie rod end should not be connected nor should the anti-roll bar linkage. Of course, the shock absorber needs to be out entirely. In order to make sure that the upright isn’t damaged by flopping freely, secure it by tying up or otherwise securing the upright through the upper ball joint pin hole. I just used some old brake line and loosely attached the upright to the upper fulcrum shaft. You just need to have the upright and the lower wishbone swing freely enough to lower the wishbone to the required level. The required length according to the Bentley manual is 17 13/16 inches from the centers of the upper and lower bolts for the shock absorber. The manual supplies the plans for a bracket to hold the lower wishbone in place while adjusting the torsion bars.
The work is in the putzing that the torsion bar requires to fit correctly. I suppose there is a methodical way of doing it, but fine adjustment requires playing around with the fit on both ends of the bar, since there are a different number of teeth on each end (24 and 25). This difference makes it possible to do some fine tuning of the fit. It took me about a half dozen tries on both bars to get the holes to line up on the rear mounting brackets. If you’ve done the filing and fitting well enough on the teeth, you shouldn’t have to do much more than slide or perhaps gently tap the bars into place. I do think that the anti-seize grease is a good idea to use on those splines.
After the torsion bar is secure, you can begin putting pressure back onto the bar by attaching the various parts: anti-roll bar linkage, steering tie rod end, upper ball joint pin, and the shock absorber. I saved the shock absorber for the end, since it was easiest to attach the parts that had the greatest flexibility first. I used a small hydraulic jack under the lower wishbone to push the assembly upward in order to get the parts attached. Even with the other parts in place, I had to sit on the frame in order to install the shock. By the way, you need to attach the lower end of the shock absorber first, and then pull it up to fit the upper end.
As you can see, I have gone with “Boge” shocks all around. They have the same shape as the original Girling shocks, and they get good reports from people who have fitted them in a “stock” setup like what I have intended with this restoration. I suppose that if I wanted to look more “authentic” I could go ahead and paint these shocks the original Girling blue and they could pass for the old Girlings. Boge black suits me just fine, at any rate.
Fitting the shock absorbers did teach me the uses of being a part pack rat during disassembly. A small spacer that fits inside the bush-halves at the low end of the shock looked to me to be the kind of thing that many people probably toss. The piece looks like it might come shipped as part of replacement bushes, but that’s not the case. The part fits easily into the bushes, which you slide in at both sides of the shock. There is no need to press the spacer into place. The big end goes against the lower wishbone.
An odd fall, this last one. Sometimes it was as warm as summer, and then, before you get too used to the nice weather, in popped a cold spell for a visit. I still have some paint touch up to do before I can turn to the final buffing and shining, but I’ll need some sustained warmth before I can swing the paint sprayer again. Now that it’s almost the turn of the year, warmth might wait ’til spring to come back.
So, over the past couple of months, I’ve done various things, mainly on the areas of the car forward of the firewall (“front bulkhead”), but also some on the interior. I’ve devoted a page to the specifics: the firewall section (this page), the front suspension, the steering setup, the pedal and master cylinder asssemblies and the rest. “The rest” means the left over of what I did, not the rest of the car, unfortunately. It includes beginning installation of sound dampener/insulation on the interior, shipping some chrome off to be redone, and beginning work on breakdown of the IRS.
Firewall Sundries
The firewall is a place for lots of individual parts, so as you go about refinishing and reinstalling them you do get the feeling that you are really moving along. The nice thing about the firewall work is that you can also tackle a complete piece in an evening or two, making for a satisfying pace. When I compare the firewall clutter on my truck (a ten-year-old Ford F-150) with the minimal stuff on the Jag firewall, the difference is amazing. There really isn’t much on the old Jag, and what was placed there seems to me to have a certain ornamental flair. (Perhaps that is a bit of bias impinging on judgment.) That simplicity comes in part from the fact that the firewall had to serve both right-hand and left-hand drive configurations. So there are many parts that are placed in a somewhat mirrored fashion, not exactly mirrored of course. This means that something like the blanking plates for the pedal assembly are required on the Jag, whereas I don’t think my pickup has anything like those. And since they’re on the Jag, they could be adorned with cadmium plate. And since the configurations are mirrored, the firewall always has some area more or less unused opposite the used space, though individual sections of the firewall are also set up so that they can accept different parts.
The first thing I took on was the wiper motor. It’s basically a steel sheel surrounding the rotor and armature with pot metal caps. A gear assembly comes off the top of the motor and contains a large nylon gear driven by a brass worm gear off the motor. The motor itself is straightforward, but the controls are a little formidable because of the requirement that the wipers “back off” and go back into their off position once the wipers are turned off. This means reversing the motor to set the wipers into their resting place.
I was a dolt and tried to make the motor move by touching wires with a six-volt battery charger. There wasn’t anything that moved, and when I thought that perhaps this was a stupid thing to do (after a couple of touches to no effect), I gave up. I asked about ways of testing the motor on the Jag-lovers forum, but apparently there’s not much to do until the switches and wires are correctly installed. I was warned about messing with battery charges and delicate wiring, though!
Putting the motor into visible order was a matter of dismantling the pieces and cleaning them up. The steel motor housing is painted a hammered silver/grey. I used a multipurpose grease on the gears. They had been greased before, and the grease had firmed up quite a bit. It wasn’t hard or rubbery, but it was old and stiff. Installation of the motor was a matter of fitting the wiper arm and sliding it into the inner part of the firewall and bolting the mounting plate. Now I can look at it and hope it will work.
The windshield washer jar and pump were original, as was the mounting bracket that attaches them to the firewall. The washer pump lacked a part that apparently sits below fluid level and is driven by the small motor mounted on the jar lid. This meant, of course, that the pump was functionally worthless, even though it looked good after cleanup and a spray of satin black paint. New washer pumps are available, but they don’t look like the old one I have, as far as I can tell. I decided to mount a “universal” washer pump in the area inside the firewall behind the washer fluid jar, and let it use the existing lid and tubing to draw fluid from the jar. It’ll be invisible, and it should work to pump fluid. Although I will hook up the contacts on the old pump, they won’t be connected. Instead, the real wiring will go to the new and hidden pump.
New rubber tubing was fitted. I got it from McMaster-Carr, a place that amazes me continuously. I also installed the first rubber grommet in the firewall for the washer tubing. This grommet came from the body seal and rubber kit that is offered by Classic Jaguar. I look forward to installing the rest of the rubber parts!
The mounting bracket was a bit of a job. The rubber guard on the side bars (see the closeup picture of the restored part) completely rotted and had turned into little more than a sticky goo. More rubber had deteriorated at the base of the bracket. I’m not exactly sure why it behaved this way, since it appeared to have been dissolved in some fashion. By solvents in the washer fluid, perhaps? At any rate, that had to be completely removed. After I stripped the paint on the remaining parts, I repainted gloss black, leaving the side bars unpainted. I decided to try reapplying the rubber coating with Plasti Dip, a product that is used to give tools a rubber-like grip on their handles. You usually dip parts into the product, but I brushed it on the bars. It took several coats to build up sufficiently, but the end product looks quite good. The Plasti Dip looks like it will be quite durable, too. I have loads of the stuff left.
The fuel filter bowl and the bonnet latch assemblies also went on after thorough cleaning. I’ll be removing the fuel filter bowl to install the car number plate. I’m a little disappointed wth the reproduction of the car number plate. It evokes the original, but it doesn’t come too near duplicating it. The past couple of days I’ve been toying with the idea of doing my own (and more true) number plate. It seems that the people who did the reproductions could have been more scrupulous.
The gas tank had waited in the chicken coop for two years. That was long enough to take on a couple of boarders — mice who built a nice soft nest behind an inside baffle. In spite of the fact that the gas tank was bone dry from the first day we got the car, I know that mice hadn’t invaded until we took possession. The nest I pulled out piece by piece and sucked out with my shop vacuum was made of our brand of paper towel and a cotton swab or two that had been lying around. I had to use some wire to fish out the little bits. Time to set more traps, I guess.
I glanced inside the tank when we put it into storage, and I recall thinking that it was pretty rusty, though I was also happy that the tank was completely empty and had been for some time. Perhaps it is a matter of perspective now, but looking at it after two years of repairing other (worse?) rust made it seem a little better. The rust inside was scary nonetheless. There was a welded repair that had been covered with blue silicone sealer. I recall the previous owner pointing to some blue stuff and saying “Kreem?” but I have to admit that “Kreem” didn’t make much sense to me then. Now I know it is a type of gas tank sealer. Our closer look inside the tank showed us that the tank had never before been treated with a gas tank sealer. That fact simplified our work, since we wouldn’t have to remove a previous sealer to apply our own.
The underside of the tank, on the corner nearest the threaded hole for the fuel sump, had been repaired by cutting out a rusted area and patching it. The rest of the tank wall was unmolested and solid. The rust repair was probably done at the same time as the “repair” of the fuel sump hole on the trunk floor that we redid. This area of the E-type is commonly rusted, I’ve heard. It can collect water, since it is in close proximity to a hole fairly near the pavement and since Jaguar apparently used jute pads to soundproof. The jute pads were situated between the gas tank and the floor of the trunk. Unfortunately, they soaked up moisture and eventually promoted rust.
Bottom line: We didn’t need to do rust damage repair, though sealing and removal of lesser rust deposits were still needed.
I decided to use POR-15’s “US Standard Fuel Tank Sealer” kit. I’d read positive reviews, and I’ve been overall happy with other POR-15 products I’ve used. I know that the rust protection coating is mighty tough stuff, and I figured the sealer would be tough, too. Also, I was attracted by the simplicity of buying a kit that included everything I’d need. Cost was in line with what I expected: $50-$75. My kit arrived with two quarts of “Marine Clean” detergent, a quart of “Metal Ready” rust converter and metal etcher, a quart of sealer, and a large-ish container of fuel treatment, that I won’t use until I actually put gas into the tank. A single letter-sized sheet contains all of the instructions. In short, you clean the tank thoroughly, convert any remaining rust and etch the steel, and then coat with the sealer. (See the sidebar for all the details of our sealing job.)
Since I wanted to make the most out of the detergent that came from POR-15, I decided to do a pre-cleaning of the inside of the tank. There was no sense in pouring in the special detergent to do what regular old “industrial strength” degreaser-detergent would do. To that end, I used a 1:1 dilution of Kirkland brand (yes, it came from Costco) “industrial/commercial” degreaser-detergent. This stuff is colored a flourescent-like green. I’ve used it to degrease parts and I’ve even used it — with spotty results — to clean items that were to be zinc plated. It has worked very well to remove grits and greasy deposits. I used the regular degreaser in the same manner that the POR-15 folks recommended using their “Marine Clean” detergent. The first cleaning really took out a lot of junk, both loose chunks of grit and flaked rust and dissolved goo. The detergent mix came out looking like eight-hour old espresso. After a clean water rinse, I redid it. The second batch of detergent came out signficantly more clean, but still definitely brown. The third batch came out virtually the same color as it went in (see the left half of the comparison picture in the sidebar), so I figured that the detergent had done as much as it could.
At that point, I began using the “Marine Clean.” Now, “Marine Clean” is a clear liquid, and the POR-15 people claim that it dissolves varnishes and residues that result from oxidizing fuels. Apparently this works in gas lines as well as gas tanks. I actually wasn’t expecting the “Marine Clean” to get as much out of the tank as it in fact did, since I’d already cleaned the tank with some also pretty tough detergent. That “Marine Clean” really works — the first 1:1 dilution came out significantly brown, indicating it was at least dissolving what my other detergent couldn’t. The second dilution also came out somewhat brown. One thing that was a bit unsual was that the instructions suggested that there was a third application of the “Marine Clean,” but my kit contained two quarts of the stuff. I figured that the POR-15 people decided that three was overkill and two would suffice.
The test of the relative strength of a “industrial” degreaser-detergent and the POR-15 “Marine Clean” detergent was really the only surprise in the process of sealing the gas tank. The rest of the process went without much to note.
After the inside was sealed, I painted the outside of the tank. I did decide to mask the areas where the fuel pump and the fuel level sensor attach as well as the threads for the fuel sump. These now are clean metal. I am thinking about installing a different (more dependable?) fuel pump, though I’m not sure what type, submersible or not. That is a question I do not need to answer right now, however.
The gas tank looks nice. I’ll have to keep more rodent boarders from moving in!
Gas tank treatment, step-by-step using POR-15 Fuel Tank Sealer Kit
Pretty scary, I thought, when I first took a look at the inside of the gas tank. This area is the welded repair that must have been associated with the rusted out trunk. I think that the rusted out trunk floor became a problem when gas began to leak. The area immediately adjacent to the welded repair on the tank exterior had some pitting as well.
The instructions for the tank kit said to clean the tank with the “Marine Clean” detergent, diluted 1:1. I decided to use some regular old “industrial degreaser-detergent” (purchased from Costco) to do the initial cleaning. This entailed sloshing around a 1:1 mixture of water and degreaser. I did this three times, and I let the detergent soak for about an hour in the tank. The first time the mixture came out a coffee-colored liquid. After a clean water rinse and another Costco-brand slosh, the detergent had done as much as it could. It came out almost completely the color it went in. The picture above shows the results on the interior — there were some results but the best was yet to come.
The picture shows the last Costco-brand detergent and the first “Marine Clean” detergent mix. It’s pretty obvious that the Costco detergent had done its best. And the “Marine Clean” — which went in completely colorless — came out quite brown. The “Marine Clean” detergent is claimed to remove fuel residues and varnishes that appear in fuel tanks and fuel lines. I was skeptical, but I was pleasantly surprised by the result, especially after I had cleaned up as best as I could with other detergent.
This shows the tank floor after two applications of the “Marine Clean” detergent. Although the instructions said that the final detergent soaking would pour out almost clean, that was not my experience. That second soak came out brownish, too. I’m assuming this second application was adequate, since a third quart of “Marine Clean” did not come in my kit, although the instructions mention a third application of the diluted detergent. What is shown here really amounts to a thin coating of rust. I could easily rub it off with my fingertips.
After the inside is free of greases, oils, and varnish, the rust is converted with a product called “Metal Ready.” Basically, this converts iron oxide rust and etches the metal surface. This left (or, perhaps more accurately, replaced) the rust film with a grey film that came off just as easily as the rust. This picture shows the treated surface after it had been rinsed with clean water. The surface came quite clean, since you can see the brazed welds quite easily and the steel looks like steel.
An old hair dryer served as the forced air source. It was perfect, since I just shoved it in a hole and turned it on. For the most part, I kept the dryer running without using the heater. Hot air went in about three hours all told, and it definitely heated the tank. Overall, I ran the hair dryer about ten hours. Completely drying the inside of the tank is very important, and the kit instructions especially stress this. The tank sealer will not adhere to a wet or moist tank wall.
The POR-15 kit comes with a quart of fuel tank sealer, which looks to me to be the same stuff as POR-15 metal coating. Stinks the same, at least, and it looks pretty much the same, too. We duct taped the openings on the gas tank, poured the sealer into the very dry tank, and rotated it to make sure that the coating covered the entire interior surface. After that, we poured the excess out — about a pint remained. The kit instructions said to leave the can open, so that it wouldn’t explode (!), and that does make me think that the sealer is somehow different from POR-15 metal coatings, since those are resealable, at least for short term.
The inside of the tank now looks like this. The POR-15 instructions say that you can repair larger holes with a fabric-like product and POR-15 sealer applied to the outside of the tank over the holes. Thank goodness we won’t need to do that kind of thing!
This entry begins the third year of restoration work on the old car.
Clearcoat and boot lid installation
The car body was completely sanded smooth with 800 grit sandpaper, and ripples and “orange peel” areas were smoothed out. The surface was then degreased and coated with another double coat of clearcoat. This final clear coat will undergo the “color sanding” process and then finally be buffed to a fine shine.
We painted and clear coated the door exteriors and the trunk (boot) lid, too. The boot hinges were painted some weeks ago, and they had been awaiting reassembly. I had a number of boot hinge springs that had broken, and I replaced those with new ones using a modification of the methods that have been described by George Cohn (on the Jag Lovers forum) and Classic Jaguar. They are good descriptions and entirely predictable, in that there aren’t very many ways to do the job. One thing I did do that wasn’t listed in the directions was grease between the individual springs. Although the springs don’t do an incredible amount of rubbing, I did notice evidence of wear on my old springs (which were not greased). I figured that adding a smattering of grease probably would alleviate a little friction over time, though at the expense of introducing grease into a storage area. I suspect that the original springs were not greased simply because Jaguar drivers didn’t really want luggage and storables stained with grease. And that would be a hazard of greasing boot lid hinge springs.
The E-type is not a remarkably wondrous vehicle for transporting much other than two passengers, so I wasn’t going to worry about an occasional grease stain.
Once you install the hinges and attach the lid, you almost have to install the latching mechanism. E-types have a release fitted on the rear bulkhead in the car’s interior. There was no lock on the early Series I cars — that was introduced, I believe, with the late 3.8 liter cars or with the introduction of the 4.2 liter engine. On my car, you just pull the knob and the lid pops up. As far as I can tell, there isn’t an easy way to release the trunk lid if the cable attached to the knob and the latching mechanism fails. You’re basically stuck, or you have to be very adept with needlenose pliers stuck through the holes for mounting the rear license plate.
My latch required little more than a good cleanup and a little black paint. The part of the latch that attaches to the lid itself was in exceptional shape, with the cadmium plate in fine polish. After all, it was protected from the elements and had been painted body color at some time.
Once the latch was fitted, the trunk could close and reveal some of the fine shape of the E-type. I couldn’t help myself — I had to attach the chrome surrounds for the license plate recess, just to get a little better picture of the rear. The doors, you might note, also are temporarily hung in place. I needed to get them out of the way, and the body shell seemed a good place to store them!
Steering wheel
Most car restoration, it seems to me, involves some form of rubbing. You can’t get away from it, even after having put in your time rubbing and sanding the body before and after painting. Even the steering wheel took its toll on my elbows, or at least required a bit of attention from my cloth polishing wheel and some compound.
The horn button comes off of the steering wheel by loosening three set screws. Once these are loosened, the horn button comes right off. Dissasembling the steering wheel from the “boss” (the aluminum cylinder that attaches the wheel to the column) means drilling out aluminum rivets. I do not plan on re-riveting the wheel to the boss, so I’m replacing them with screws and bolts. (This is a very common practice, I have learned.)
All of the aluminum on this car has some severe aluminum oxide corrosion, and the steering wheel seemed especially to suffer from it. I used 800-grit sandpaper to remove the bulk of the corrosion, and then I used a cloth buffing wheel with coarse grit to get the remainder cleaned. A single attack on the aluminum portions of the wheel was not enough. I had to go at the whole thing again with 800-grit sandpaper and buffing before things were in shape. Thet pictures of the horn button, by the way, show the wheel in mid-restoration, not final. I’ll update with other pictures, probably when things move along with the steering column and dash assemblies.
The steering wheel itself had some fairly severe cracks, and for the most part the varnish had deteriorated to the point that it had completely flaked off. I was thankful for the residues that remained, but it wasn’t entirely clear at the outset whether the wood sections of the steering wheel would be salvagable. At least the wood was very nearly complete — though a splinter of wood about four or five inches long and about an eighth-inch wide was missing between about 10 and 12 o’clock on the wheel perimeter. In this section, the aluminum steering wheel substrate was exposed. That section I chose to fill with “mahogany” wood filler, and the jury’s still out on what it will look like completely refinished. (I’ll post a picture when I get the polyurethane applied completely.)
For the crack repair, I used an approach that was suggested on the Jag Lover’s Forum: using cyanoacrylate filler to bond and fill steering wheel cracks. It worked nicely, and I just used the glue that I found at Lowes. Unlike the “Super-Glue” adhesive, this stuff was thicker than the watery stuff I’d used before as a cement. It flowed well enough into cracks, but it did bead up after I reapplied it to an already filled crack. The watery “Super-Glue” would just have spread. Because the adhesive bonds very quickly, I clamped the crack as tightly as I could before applying the glue. Even when the crack virtually disappeared under pressure of the clamps, the glue found and soaked into the crack quite easily. Because cyanoacrylates use hydroxyl ions (in water) to begin bonding, I used my breath to add moisture to the wheel before clamping a crack and applying the glue.
Sounds a little weird, but it works. (Arlene and my daughter thought it was strange for me to blow into the steering wheel.)
Cyanoacrylate is exceptionally tough stuff. It quickly soaked into the cracked wood and bonded. The areas that built up some glue were devilishly hard to sand down. After the sanding, I applied a coat of clear polyurethane, followed by light sanding and a reapplication of polyurethane. As of this writing, I’ve applied three coats of polyurethane in this fashion, and I believe that one more will be required. I’ve inserted a picture of the entire steering wheel, with the horn button laid in place. (Since it’s a large picture, I lowered the color palette, and that makes things look a little botchy.) The aluminum still needs a little work (already started, to judge from the scratches that are visible), and the wood needs sanding and another coat. By the way, the void that I had to fill is on the reverse side of the wheel, thank goodness.
Steering column and indicator switch
The steering column lacked a couple of items, and the indicator light switch was faulty. Beyond that, the indicator switch lever was badly corroded; what was originally chrome had become little more than a rusty stick with flakes of chrome loosely hanging on it. The larger picture shows the indicator switch — such as it was — on the steering column. It’s attached with a bracket setup that wraps around the outer tube of the column. The old switch clicked into place for left turns, but the right turns would not hold, making it necessary to hold the switch in place. The trouble was the nylon fitting that was cracked on the side that affected the right. We completely disassembled the switch and discovered some pretty badly burnt points and worn plastic (Bakelite?) housings. In short, the indicator switch is pretty much junk. It’ll be entirely replaced.
The steering column consists of two major parts: an outer tube and the shaft. The shaft is held in place by two bushes, one at the top of the tube and the other at the bottom. The bushes are available in felt or plastic. I went with the plastic versions, in spite of the fact that the originals were felt. The felt bushes are sandwiched by washers and held in place by a wire circlip that snaps into holes on the top and bottom sides of the outer tube. The plastic arrangement is much simpler, since the plastic ring simply snaps into place in the holes. (The holes for the upper bush are visible in the picture on the left.) The two bushes have unequal inner dimensions. The lower bush is smaller than the upper one, since the shaft tapers in stepwise fashion from top to bottom.
When we picked up the car, the steering column shaft was noticably shaky in the tube. This was because a previous owner didn’t bother to replace the felt bushes but instead rigged up a plastic arrangement. This “bush” was mounted centrally on the column (a great pivot, of course), fashioned from a plastic bottle cap, and affixed with electrical tape. In order to reduce drag, I suppose, the entire shaft was smeared with grease. It is actually amazing that the shaft didn’t bind firmly in the tube, because the electrical tape easily unravelled.
I took pictures of the plastic replacement bushes, but (alas) they are stuck on my digital camera. The dongle has disappeared from the household, and of course no one has any idea where it is. When it reappears (soon, I hope), I’ll post a photo of the bushes.
It seems like it’s taken ages too long to get to this point, but the body is finally sporting Opalescent Dark Green instead of blotchy primer grey! It’s been nearly two years since the boys and I fetched the car from Virginia, and it is only now on the way to coming back together into car-like shape.
I don’t think it’s worth going over the tedium of sanding the bonnet (endlessly!), except to say that the process forced me to head to the paint shop for another quart of high-build primer. That last quart barely made it, too. To count the quarts of primer I’ve sprayed, you’d think that the car body would be little more than a large clump of primer, but that’s not the case. Most of the primer ended up suspended in water in a bucket after being wet-sanded off the body. I do think that my inexperience made the block sanding a little more difficult and protracted than would be the case in a real body shop.
If there is a science to block sanding, it has to be a matter of using the longest sanding board that you can manage on the space. I think the depressions that I ground into the primer — only to refill them with yet another spray — came about because I used either a short block or I used a too flexible styrofoam block at the wrong time. The persistent waves on the bonnet’s wings were conquered after I only used my long firm sanding board. (The picture above appears to show some wavy light lines to the right of the performance bulge. Those light lines are bowed because of the pressure of the bonnet sitting on the sawhorse underneath. When it’s not mounted on sawhorses the bonnet itself is straight, thank goodness!)
All surfaces of the car have been sprayed with color now, with the exception of the exterior sides of the doors and the trunk/boot lid and the gas filler cover. These final parts will probably be sporting Opalescent Dark Green after the Labor Day holiday in September.
Body shell color
The body shell took color well into August, and really the body shell didn’t take much time in August to prepare since most of the work had already been done. In July, I sprayed the final coat of high-build primer, and then I pretty much let it sit. The only preparation was sanding the wings lightly with a flexible styrofoam sanding board and them paying much more attention to the sills. I used the long sanding board on the sills, and this final prime/block-sanding took out the last of the ripples.
So, when it really came down to doing the job, the first part was masking. Since I had already sprayed color on the interior, inside the boot/trunk, inside the gas tank filler hole, and on the front bulkhead/firewall and subframes, those were all masked off. The borders of the already painted areas were scuffed with steel wool, and the masking tape exposed a small section of the already painted area. The narrow painted areas would get another coat of seal, basecoat, and clear. I figured it was worth coating these areas twice, just to make sure that color was uniform, and no lines of primer appear in the final product. These sections were all in “channels” so they are unobtrusive or obscured by rubber seals.
The process of masking took far longer than I anticipated. The easiest was the firewall/front bulkhead section since it was pretty much a straight shot. The trunk/boot area and the interior were more difficult because tape needed to be pressed from behind the plastic sheeting. I usually outlined the area with wide masking tape and then pressed plastic sheets onto the outline. The masking picture to the left shows the finished product. I used plastic grocery bags on the “A” posts, and Costco paper towel packaging served as the plastic covering for the trunk/boot area. The interior was draped in garbage bags that were cut along the heat-sealed edges to make large thin plastic sheets. I found that the thicker “drop cloth” plastic that you get at the lumber yard was simply too thick and not pliable enough to work with easily. (I ran out of 2-mil plastic sheet, and that worked very well, I should say.) The gas tank filler hole was just taped, no plastic needed.
On the masking tape: I don’t recall the wide selection of masking tapes a few years ago. Perhaps there were indeed time-rated masking tapes of various colors at paint shops, but I never ran into them. For this masking, I unsuccessfully tried a purple masking tape whose adhesive was supposed to be good for up to a month without drying out. The adhesives, apparently, can cause damage if you leave them on too long. I will admit that I have run into very old dried masking tape that’s been a bear to get off without damaging the underlying paint.
Well, kinder and gentler masking tape is a very fine idea, but the stuff has to stick in the first place. My experience with the purple masking tape was that it stuck at first, and then let loose with the slightest of pressure (like the blow of air from a paint gun) or it simply pooped out and let loose. My suggestion on the time-rated tape is to use the regular sticky beige masking tape, which I was told was good for “no more than four hours.” Unlike the purple stuff, the regular masking tape sticks. Although it’s worth taking it off as soon as you can, I’ve not had trouble with it damaging underlying paint even after several days. Leave it on for weeks, and you might have trouble. I noticed that Bill McKenna used the purple stuff when he was masking his E-type coupe for painting. I don’t know what he thinks about it, though.
The paint process, as before, entailed careful cleanup, spraying sealer, spraying basecost, and finally spraying clear.
I was a bit concerned about any wrinkling in areas where the paint might resist sticking, as I had run into before. Clearly, this is a surface preparation problem, and I think I ran into it because I did use a silicone-based sealer on some weld points. That should not be an issue on the body exterior anywhere, but I was careful to clean the primed surface with clean water, which I then dried with lint-free towels. This left the surface without any dusty primer residues from sanding. Next I used a “liquid deglosser/degreaser” that I have seen remove oils and grease quite effectively. I picked it up at Lowe’s so it is not anything special — just a typical brand. The degreaser is quite volatile, so it evaporates quickly. Then, after about an hour or so wait, on goes the sealer. The process is the same as before.
We departed from the previous paint sessions by blocking the completely dried clearcoat with 800-grit wet sandpaper. This wasn’t done immediately; I waited ten days to take it on. Because the surface was well shaped, there were no areas where I sanded through to the basecoat. I used a fairly small block of medium stiffness styrofoam (actually it was 3/4 inch foam insulation). For areas where I detected runs in the clear, I used either a section from a wood paint stirring stick wrapped in 800-grit or a small hard rubber sanding block to focus on the high areas. When I talked with the people at my paint shop, they were concerned that the clear was thick enough. If you do sand through to the basecoat, I was told, “you end up with a mess.” They advised that at least two coats of clear be on the surface before sanding. I didn’t count the coats on the car body, but I know that we resprayed the clear after the original coat had set a while. So, I wasn’t worried.
This post-clearcoat sanding was not a tenth as onerous as blocking primer, and a third as messy. The clear is much, much tougher than high-build primer, naturally, and so the mess is small. You end up with a thin lather of suspended clear over the surface, and the unfortunate orange peel or run ripples are easy enough to remove.
Bonnet color
As I’ve said before, the E-type bonnet makes up much more than even its formidable size in the imaginations of car enthusiasts. The bonnet itself comes close to expressing the most special qualities of the E-type. So, when it came to applying color, painting the bonnet meant really painting the car. And we wanted it to be perfect. But we did run into disconcerting troubles before we finished the job.
The bonnet came in from the outside where the interior was sprayed with color after all the rock guard and primer had gone on. I believe that we can finally dismantle the old rolling rack that held the car shell for over a year. (We made the rack from wood salvaged from a humble old chicken coop. So, I guess one could say that instead of finding this car in a chicken coop, this one was on top of one for more than a year.) We put the bonnet on saw horses that fit to each side of the performance bulge and nearly touching the inner duct wings. This was a mistake. Or, at least the way we set the bonnet on the horses was a mistake. We didn’t pad the points where the bonnet and the sawhorses met, and we discovered that the weight of the bonnet pushed the metal out at the forward-most points of contact. On the left side, this was a gentle bulge that disappeared when we lifted the bonnet from the sawhorses, but on the right we have a little touch-up to do. I think we’ll be able to press out or gently knock out a persistent bulge on the left side. Aaron noticed the bulges when we were rubbing the bonnet with steel wool (for reasons spelled out later). They were unfortunately not visible at the time we set the bonnet on the sawhorses.
The Moral: If you use sawhorses to suspend your bonnet, make sure that you have the sawhorses well padded, and I think fashioning a broad supporting plate from plywood is advisable. You need to spread the weight resting on the sawhorses.
I mentioned steel wool. Here’s the story — another mistake that a little research solved, but that could have been messier to deal with had we continued with the painting process. After the sealer and the basecoat was applied, we noticed that the basecoat was drying “cloudy,” as if it had been lightly covered with a whitish-grey spray. This was only apparent after the basecoat had dried, and the cloudiness was not uniform across the surface of the bonnet. In general, it followed wide lines of the spraying itself, usually appearing where there was probably an overlap of spray.
I had not run into this on other surfaces, and I initially thought that the cloudiness might be resolved when the clearcoat was applied, since the clear is supposed to melt and resuspend the base. But I wasn’t sure, so I searched the web and found that this is a common phenomenon that is usually caused by thinning the basecoat too much or by applying clearcoat before the basecoat has dried sufficiently. The “cloudiness” is actually suspended flakes that float to the surface of the too-thin paint. The recommendation was to reshoot base on the surface, making sure that the basecoat paint was accurately thinned. Not too much, not too little — just right.
I took a little fine steel wool after a cloudy section, and the clouds disappeared with a little rubbing. The integrity of the basecoat (which dries very soft) was unassailed. Aaron and I rubbed the entire surface of the bonnet with steel wool to dispel the clouds, so to speak. After that, Aaron cleaned the surface with compressed air, and I sprayed another thin coat of basecoat over the bonnet. It dried as expected, and then the clear went on. We let the clear set for about a half hour, and then sprayed a second coat over the almost-dried first coat. It was a bad oversight on my part to have missed taking a picture of the clouded basecoat. If it happens again, and I hope it won’t, I’ll remember to take a picture. You can imagine that things were a little tense around the old DeLong hacienda as the bonnet clouded up!
The bonnet will get the 800-grit sanding treatment in mid-September, about two years after we initially rolled the car into the old cat cage garage.
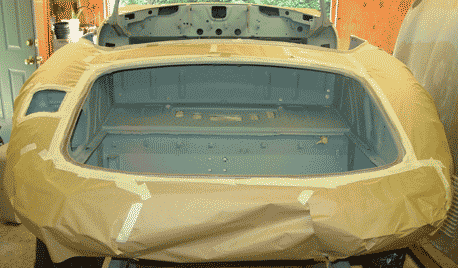
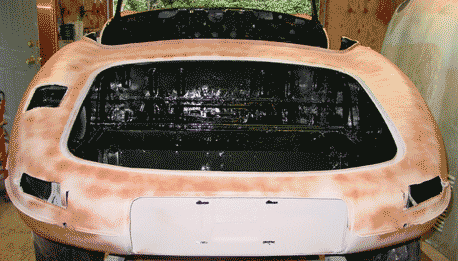
The photos below show the bonnet in primer, basecoat (after steel wool treatment) and after the clearcoat. You can see one of the door panels to the rear of the bonnet. The interior sections of the doors and the trunk/boot lid were painted with the bonnet.
Moving car shell off rack, bonnet again (17 – 23 July)
The weekend of 17-18 July was mainly devoted to lowering the car shell from the wooden rack, cleaning the garage, and moving the bonnet outside. It was, I suppose, rather uneventful, except for the fact that it meant that the car was closer than ever to supporting itself on four wheels. For that matter it was closer to the ground than it had been for over a year — on 15 March 2003 the car went up on its wooden frame.
We moved the wooden frame out of the garage and then moved the bonnet from its corner to perch on the wooden rack. I can cover it with a tarp to protect it from the elements until it’s ready to move back into the garage. Actually, the bonnet has moved in and out of the garage during the last half of July, since we’ve taken it out to spray primer and have better access to the internals and such. And then we’ve moved it back into the garage in order to fit it to the body shell.
The bonnet had received the occasional final brush full of “Tie-Coat” primer when I was busy doing other things, but once it made it’s way out of the garage it has become more of a focus of our attentions. I finally sprayed it with “Tie-Coat” and this was the first and last of such stuff on a good portion of the bonnet. I wanted to use more mainline primer on the bonnet, since it worked so well on the body shell. The “Tie-Coat” cured for a couple of days, and then I went over it very quickly with a sanding block to remove the drips and such. Then I sprayed a good Dupont two-part high-build primer. This was really the first “working” coat of primer — one that would get some attention from the sanding block.
As with the other blocked primer coats, this one got a “guide” coat of spray paint, this time a black gloss because it was the only spare can of paint I had on hand. I’ve found that the Rustoleum “rusty metal” primer is a good guide coat paint, since it doesn’t build up in sandpaper. I didn’t have any available, though. The bonnet nose finally looks as though it is getting into final shape. (Somehow, I feel that I have said or thought that before with the bonnet.) Once again, I have shaved off and tapped metal a bit on the right side. This has the good effect of removing body filler, but it seems a bit late in the game to be shaping the nose even still. Some final dings I have filled with Evercoat “Easy Sand” filler (good stuff!). If you look closely at the bonnet nose pictures you can see several shades: spots of exposed metal are dark, a pinkish color is body filler used after hammering out the metal, light blue (almost white) is “Easy Sand,” sky blue is “Tie-Coat” primer and the grey is the two-part high-build primer. I put three small pieces of purple masking tape on an area of concern: a gentle dip on the left side of the “performance bulge.” This place will get a little extra high-build when I next spray it. This is a barely perceptible dip that I think can be eliminated without too much of a buildup of primer, especially since the area surrounding it has been brought down with block sanding.
Quite a while ago I had zinc plated parts of the bonnet latch brackets that attach to the body shell and accept the latch “peg” from the bonnet. I had to repair the parts of the side latches that attach to the bonnet and hold the pegs that fit into the holes on the brackets. I believe these are called “bonnet locating pegs” and “bonnet lock brackets.” The single remaining rubber bonnet locating peg pad is exhausted, so I’ll need to get new ones. They look like special parts, and I don’t think I’ll be able to find a “generic” equivalent. These rubber parts fit around the pegs and keep the metal latch brackets from banging metal-to-metal.
The right side latch bracket that fits onto the bonnet was broken at the point where the locating peg was attached. This seems to be further evidence of a rather bad impact to the right front side of the car at some point. My guess is that the peg was either ripped off at that time or the bracket and the peg were severely bent and they eventually weakened and fell off, or were simply torn off to get them out of the way. Blame a previous owner. I could have located a replacement, but I decided to repair the original with a washer and some deft welding and grinding. I also fashioned a new peg that is very close to the peg on the intact left side latch bracket. I am now thinking that I will plate the pegs with zinc and paint the brackets with a metal/aluminum paint. The pegs will need to have a durable, abrasion-resistant coating.
The latches really helped in fitting the bonnet to the car body, since they keep alignment and support the outer rear wings in place while you adjust the bonnet mounts at the bonnet hinges. When I had previously (and grossly) fitted the bonnet (see the earliest attempt in August 2003 and the most recent in March 2004), I had not used the latches, since these were, after all, gross fittings. My main intent was to see how well the rear section of the bonnet met the front bulkhead. But at this point I was more interested in seeing how the outer lines of the bonnet fit the outer lines of the body shell, and so I needed to be more discriminating in the fit.
The more discriminating fit was, well, merely all right. The side panels met better on the left side than the right side, and the gross geometry overall was in good shape. But I could not do the blocking over the channels as I had hoped. The structure itself was too fluid and loose, and so it was apparent that I had to fit the bonnet internals more permanently in order to work with the outer lines of the bonnet.
So, the bonnet came off and was returned to the rack. This time it went on upside down, though, in order to give easy access to the inside of the bonnet. I had not yet glued the flanges to to inside of the center section of the bonnet. These flanges hold the two ducts in place and overall provide internal support to the bonnet structure. My flanges fit very badly, leaving as much as about a half inch (one centimeter and some) of a gap toward the front of the bonnet. I decided that it was better to fashion new flanges than to try to fill the gap, so to speak, with adhesive. Apparently using an excess of adhesive is common practice, but I think it would look tacky and probably not be as stable as customized — and (I know) non-standard — flanges. So we put the last bits of the 20-gauge steel to use. (Historical note: Aaron and I fashioned the new flanges, but we also used one welded up by John Boutin when he and his family visited us back during Thanksgiving vacation 2003. He wanted to try his hand at welding and that was his project. The flange now sits in the forward right position, holding the right side duct nearest the bonnet mouth.)
Mike Moore, a two-time Jag E-type restorer in California, gave me particulars about getting the Sikaflex adhesive that is “original” for the E-type bonnet. Mike says it is very good stuff. Nonetheless, I decided to go with a polyurethane adhesive, since I had read in a post from Dan Mooney (of Classic Jaguar) that a good polyurethane adhesive would do the trick. Besides, I could obtain that nearby.
We glued the flanges to the metal after cleaning up the lines well. The polyurethane adhesive was certainly messy, but it set in about 24 hours. Pictures I had seen of the glued pieces show that the glue was applied generously and bulges out from the joint. Ours looks pretty standard in that regard. The polyurethane glue we used is tough stuff after it’s dried. Like what I’ve heard about Sikaflex, it is somewhat flexible, but quite resistant to movement. It is not “rubbery.”
North Carolina has periods of summer rains that occur regularly in the afternoon. Since mid July it has been a little wetter than the earlier part of the month (though we have really needed the rain). That is to say: moving forth with the bonnet while it’s perched (and covered) outside has been a little hit-or-miss. I’ve been reluctant to paint when rain threatens, of course. Priming has been a bet with the weather, but by the end of the month the bonnet internals got a coating of “Tie-Coat” primer and the two-part high-build primer. Also, the front wheel wells were coated with rock guard. Inadvertently, the rock guard ended up a two stage process, in part because our Internet connection went out after a power outage and I couldn’t consult the well illustrated “FAQ” on applying “underseal” that is posted on Classic Jaguar‘s web site.
Anyway, I initially left the frontmost section of the front well well without rock guard, since I have pictures of a restored Jaguar without rock guard. I went ahead and smoothed out some ripples on both of these sections, thinking that they were going to be smooth and painted. When RoadRunner came back up, I checked the FAQ on Classic Jaguar. Sure enough, the front portion also gets rock guard, according to Dan Mooney. The more I though about it, the more I recalled removing rock guard from that part of the bonnet, too. (I should say that I have learned not to trust anything I found on this car to be particularly reliable as far as originality is concerned.) I went ahead and applied rock guard to the front section. This was hardly an aggravation. The stuff goes on easily and is an easier cleanup than having to clean up a spray gun. I again used the “Gravi-Tex” product that I used for undercoating for the IRS well, rear wheel wells, and the underside of the car. It’s significantly less expensive than the 3M Rock Schutz.
That pretty much closed the month of July. I was hoping that the car would have color by the end of July, but this is close enough. The rains of the last week or so didn’t cooperate with me. The inside of the bonnet still needs a bit of block sanding (nothing too meticulous, though) and another shot of two-part primer. Then I think we’ll refit it to the car body, and finalize the blocking.
Then … color! Maybe. I’m now hoping that August is the magical month.
Forgotten tidbit: Underside painted Opalescent Dark Green (a while ago — mid-June 2004)
I neglected to mention how I managed to paint the underside of the car. This entailed lifting the car up off the rack and moving the rack back until the rear section of the car was supported beneath the foremost section of the boot floor, just behind the housing for the IRS. The front of the car — basically at the point where the frames attach to the body — was supported by a saw horse. This left the entire mid-section of the floor completely free. And I simply painted it. I wasn’t too cramped, since the car was about four feet (a little over a meter) off the ground. (The operation did not lend itself to photography, I’m afraid.)
Of course, the underside of the car is painted Opalescent Dark Green over the rock guard.
First, I want to announce that I have indeed found something that you can entirely make out of Bondo and not feel at all bad about it. I manufactured a completely bogus 1963 North Carolina license plate with some old Plexiglass, a handful of modelling clay, some plaster of Paris, Bondo (the cheap kind), and some paints found in the garage. The process was simple: Using the plexiglas as a base, I fashioned the raised letters and numbers with the modelling clay, making the side bevels a bit more gradual than the eventual product. This allowed for some material for shaping. After applying a bit of dishwasher soap and water to the Plexiglas and clay plate, I poured plaster of Paris over the plate. This made a mold. After the mold had set, I applied Bondo to the mold, and embedded a piece of wire screen for strength — an entirely good “blodger” practice. I had to break the plaster apart to remove it from the Bondo, in spite of the soapy lubricant. Final shaping was with sandpaper.
The plate design came from the web. People actually have extensive collections of automobile license plates. Yellow lettering over a black background was official for 1963, and apparently the first two characters were alphabetical, followed by and dash and then four numbers.
Does this make me a felon? Sure hope not! I’ll only use this plate for show, if I ever do that.
Priming and painting
Priming and painting have occupied July so far. I decided to move away from the POR-15 “Tie-Coat” Primer, which basically serves to bond to the POR-15 sealing coat. Although it’s a buildable primer, it’s expensive. I worked a bit with a two-part epoxy primer when I painted the truck that the boys wrecked (good painting practice, I figured). I liked the two-part primer better than the “Tie-Coat,” and I do think that the epoxy paint probably is tougher than the “Tie-Coat.” I have focused this priming/sanding effort on the exterior sections of the car body. The inside of the trunk and the interior I have left with just the “Tie-Coat” primer. I block sanded only sections of the trunk interior that will be visible at times, namely the floor beneath the spare tire.
I decided to spray a sealer before any color. It isn’t absolutely necessary, but I ran into a problem with paint not sticking and bubbling up. That was enough of a pain to go through the precaution of using a sealer. Surface preparation entailed washing the surfaces with clean water to remove dust and dirt. After that I used a degreaser to remove any residues of grease or oils that might have dropped onto the surfaces. Then it was a matter of waiting and watching for everything to dry — and no long wait was required, since North Carolina has been hot lately. I gave it about two hours.
The Dupont sealer I used is three-part: a base, a thinner-activator, and an activator. Pot life for the mixed product is only one hour. I have found that the stuff is tough to clean off of hands and any surface where it’s dried. I was told that the sealer should be allowed to dry, but that painting over it should take place pretty soon after drying. An overnight dry-time is not appropriate, I was told by some experienced painters. If the sealer dries overnight, I was told to “scuff it up” before applying color.
After sealer comes the color and then the clearcoat. One thing I’ve noticed with spraying color over the sealer: you need to be sure not to miss any places. The dark grey of the sealer masquerades as the opalescent basecoat, even when I’ve sprayed in very good light. I’ve decided to spray two or even three coats of base color, methodically covering all areas. Method is probably the key here — start and end your painting of a section following a plan.
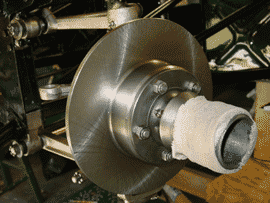
This part of the front suspension story focuses on the wheel hubs, the bearings, and the brake rotors. Actually, the process is quite straightforward, and it is certainly easier than the installation of the wishbones. One thing that might look a little odd is that the hubs are both sporting “socks” — quite literally. The socks are there to protect the splines from damage. It’s a good thing to have on the hubs from the very first time that the hubs are exposed after removing the wheels. Hubs are very expensive little parts to replace, and damaged splines are a primary reason for replacement.
I believe the hubs on the E-type originally were plated, and there was evidence of plate (nickel?) on my hubs. I decided not to have them replated, since they are totally obscured by the wheels. In order to prevent rust, I am waxing the exposed steel and applying a “waxoyl”-like sealant. That, and the fact that the car is not going to do duty in bad weather, should keep the wheels in reasonably good shape.
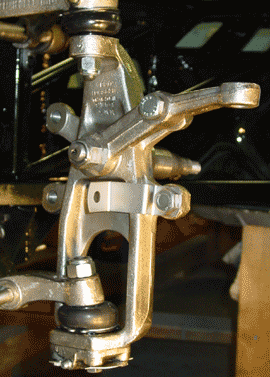
The steering arm attaches to the central lock nut on the stub axel and to the upper forward support (one of four such supports radiating from the center of the upright).
Cleaning up the hubs was a chore. I had to sandblast the grime and fused rust-grease off. Then I polished the surface with a wire brush and coarse steel wool.
It’s important to install the correct hub on each side. Reverse them, and you might find that your front wheels won’t stay on. That is definitely a problem!
Here’s my experience. Take it as information from someone whose done the work. Remember “your mileage may vary” — use this narrative and the pictures to guide and inform your better judgment.
Install stub axel and the steering arm. The stub axel fits into the center hole in the upright. The steering arm fits between the upright and the stub axel nut and extends to the upper forward support, which is one of four such supports that radiate from the center hole. The rear pair are used to attach the brake caliper and the lower forward support is used to attach the brake line bracket.I found that all of the threads on all of these supports needed to be cleaned out, and now is the time to do the cleaning of all of the threads. If you wait to do the brake caliper threads until after you have installed the brake rotor, you will have a bit of trouble, since the rotor will get in the way. So, if you want to clean threads, clean them all before mounting anything on the supports. The threads on my uprights were 1/2 inch 20 NF threads.
The left side steering arm bears an embossed “R” that made me think it was supposed to go on the right. Apparently this is not the case, since the part only fits on the left side.
The four bolts that fit into the support holes are in three sizes. The two with holes drilled through the heads are for the brake calipers (the holes are for the wire lock), the longest one of the bunch is for the steering arm, and the shortest one is for the brake line bracket. All of the bolts should have split lock washers. I plated the bolts with zinc, as (I believe) they were originally.
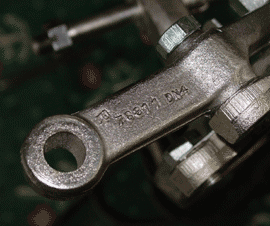
I ran into a curious thing on one steering arm. The two arms are specific to a side, and they are not interchangable. Often the side is indicated on the part (as with the torsion bars), but I found that the steering arm that fit on the left side of the car has a raised “R” near the part number, and the steering arm on the right was unmarked. It could be that the “R” is actually unrelated to which side the part goes on, though it seemed an odd casting mark to use in this case. (The sidebar includes a photograph of the steering arm with the “R.”)
The stub axel gets firmly pressed into the recess on the outer side of the upright as you tighten the stud axel nut. The nut itself has a nylon lock ring. Inspect the nylon before fitting the stub axel with it. If the nylon has been damaged, it’s best to replace the nut. This nut, I would think, would have been a good candidate for something other than nylon to provide the locking.
Place the splash guard, rubber seal, and the inner bearings on stub axel. Now that the stub axel is in place, the process of fitting the various parts of the bearings begins. To put the bearings in, surprisingly enough, you practically don’t need any tools (except when setting the races and attaching the rotor) until the very end when you’re ready to set the hub into place and adjust the tightness of the hub against the bearings. You do need to get your hands greasy.
The inner bearing goes on the stub axel after you have put the stub axel splash guard (or “water deflector”) and rubber seal on. The rubber seal is a bit confusing to set into place — which side does the flat face go on? I tested the faces of the seal against the inner bearing and found that the flat face should go away from the bearing. The flat face of the rubber seal seemed to impede the freedom of the bearing, and besides, my recollection of the removal of the old seal had the flat face pointing away from the bearing. Before you put the bearing into position, liberally pack it with grease.
My bearing kits came with the rubber seal, the bearings and their races, a cotter key to lock the castellated nut, and a pillow-like tube of grease. The tube of grease was severely brittle, probably from long contact with the grease, and so it crumbled as I squeezed out grease to apply to the first parts I installed. The trouble was that I was afraid of introducing small bits of plastic into the bearings, so I threw the tube away and fetched a can of multi-purpose grease. My grease has a red color, as you’ll see in the pictures. I was able to reuse the splash guards (also known as “water deflectors”), even though these are frequently mangled when they’re removed. I replated them with zinc. There are two of these: one that fits around the inner end of the hub and the other that fits over the stub axel nearest the upright.
The order of installation over the stub axel is 1) the splash guard, 2) the rubber seal, and 3) the inner bearing. See the photograph for how the parts actually look when in place. Basically, the splash guard goes on the stub axel so that the concave sections of the ring will accept the hub-installed splash guard. (Yes, there are two splash guards that look quite different. One mounts on the stub axel, and the other goes on the hub.) The splash guard might fit in by pressing it firmly with your fingers. If not, a tap or two with a rubber mallet will do. The rubber seal fits easily with fingers. I was a little confused by how this seal was oriented at first. I tested it against the inner bearing, and I found that if you place the flat (more or less) side of the seal against the bearing, the bearing didn’t move freely. Putting the concave side against the bearing let the bearing spin freely. That concave side has a small spring fitted inside the ring — at least mine did. Grease the bearing well before slipping it on the stub axel. It will go on easily, though it’ll probably need to be well lined up. Making sure that the stub axel is clean will ease placement of the bearing. The bearing should be firmly placed, not sloppy. You should be able to slide it off, but you also shouldn’t be able to wiggle the ring that fits onto the stub axel.
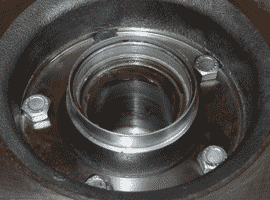
Insert inner bearing race and attach hub to the brake rotor. Getting the bearing races out is no easy thing. Putting new ones in is a little difficult, but certainly easier. It is handy to have the old race to use to help drift the new one in place. You can set the old on on the new one and hit the old one with a hammer and not have to worry too much about damaging the new race.
This is the view of the inner section of the hub and the inside of the rotor interface to the hub. The “splash guard” and inner bearing race (inside the hub and well greased) are installed. I was careful as I removed the splash guards from the hubs, so I was able to reuse them after plating them with zinc. The guards are very easy to damage when you remove them.
But before you tap it in, clean the bore where the race fits. It is supposed to be tight, and so the presence of nicks or dirt will get in the way. I used some emery cloth and steel wool to clean the bores. I also place a smidgeon of grease (not much) into into the bore. At this point do notinstall the splash guard to the end of the hub. The temptation is great, since the splash guard is an easy thing to fit. The trouble is that the guard is soft, easy to bend, and quite easy to hit with a hammer as you tap the race into place. (Believe me, I know.) Wait until after the inner bearing race is installed; then install the splash guard.
Tap the old race as it sits on top of the new one, and be sure to tap in various places along the old race. This will ensure that the new race goes in evenly and won’t bind. I placed the old race on top of the new one with the thick side on top of the new race. This makes it easier to keep the old race in place, and if the race gets stuck in the bore, you have an edge to use to drift it out from the other side. Getting the old race stuck in the bore is a possibility. Once the new race is seated, it is recessed about two or three centimeters into the bore. Of course, if you’re using the old race to tap, that means that the old race is in the bore as well. Although I didn’t need to do it, I suppose that you could sand the outside edges of the old race to make it slightly narrower — making it looser in the bore as it pushes the new race into place.
This isn’t a wonderful picture of the outer bearing race inside the hub. (I forgot to take a picture of the finished race in place.) You can just barely see it inside the hub. The outer race sits flush with the hub part, unlike the inner race, which is recessed within the bore into which it is seated. To get the inner race in place, I used an old inner race to protect the new one from blows of my hammer. I just laid the old one on the new one, and tapped the old one. The outer race I tapped into place by setting the outside of a closed face wrench against the race and tapping the other end of the wrench. I moved the wrench from place to place on the race, usually in a triangular pattern. This gradually “drifted” the race into place. You do need patience.
It’s hard to tell when the new race is completely seated. I used a toothpick to detect when the space underneath the new race was tight. I just put oriented the toothpick to probe behind the new race. If I could feel the toothpick move into a groove, I knew I had more tapping to do. Be persistent.
After the new race is in place, place the splash guard on the hub. It fits snugly, but a few taps with a rubber mallet should do the trick. You could place a wooden block on top of the splash guard and tap it in, too.
The next thing is the brake rotor. The hub and the brake rotor are connected with five nuts and bolts. The nuts are the self-locking type, though these do not use a nylon ring. They use a metal ring, which I believe is more durable. Inspect the nuts and bolts, and replace any that are damaged. The bolts are placed from in inner part of the rotor, and the nuts are exposed on the outer part of the hub. It is an easy install. The nut and the bolt are different sizes, you’ll note.
Insert outer bearing race, prepare outer bearing for insertion, mount hub/rotor. Inserting the outer bearing race is a little easier simply because the brake rotor stabilizes the hub. The rotor serves as a large stand for the hub, holding it in place. Getting the outer race in is simplified by virtue of its size. It’s quite a bit smaller than the inner bearing race. That said, you do have to set it down into the hub a little. Also, the trick of using the old race as a protection doesn’t work. (At least I couldn’t get it to work for me.) I used a stout crescent wrench with a closed end wrench on one end and the open (“crescent”) wrench on the other. The closed end wrench was smooth and, of course, the steel was tough. I placed the rounded surface of the closed end on the bearing race and tapped it into place. Again, move the wrench (or whatever you use to place against the race) to different places on the surface of the race so that it goes in evenly. This race fits evenly into the bore, so that the race lies flush with the hub when it is completely in place. (Remember, the inner race was slightly recessed into its bore.)
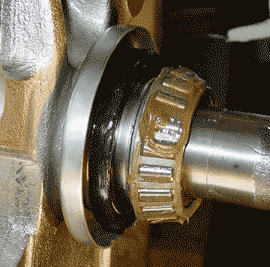
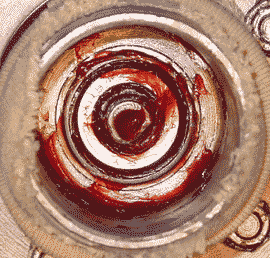
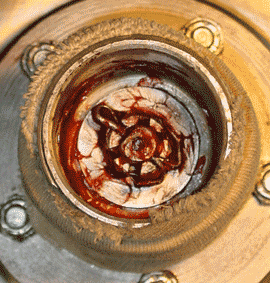
Underneath the coating of multi-purpose grease (which my wife says looks like blood in the picture) is the bearing surrounding the stub axel end and neatly fit within the race.
Once you have the outer race installed, pack grease into the outer bearing. Put some grease on the inner and outer races. Then guide the rotor and hub onto the stub axel. Things should go on nicely. You should be able to hold the hub and rotor easily in place on the inner bearing.
Place outer bearing, insert “D” washer, screw on castellated nut. Look into the end of the hub to see the outer race and the stub axel end. Take the greased up outer bearing and slip it over the end of the stub axel and into to outer race. You’ll probably have to hold the hub up a bit. You can press the bearing into place with your fingers. Holding the outer bearing in place with your fingers, you can spin the rotor and the hub quite easily.
The outer bearing — and indeed the whole hub — is held in place by a “D” washer, a castellated nut, and a cotter key. Grease the “D” washer before slipping it on. (As soon as you look at the washer, you’ll see why it’s called a “D” washer.) Screw the castellated nut onto the stub axel and hand tighten.
It’s a good thing that this is easy, because the hardest part of the whole operation is coming — putting the cotter key in to lock up the castellated nut.
Over the outer bearing goes a “D” washer and the castellated nut.
Adjust bearing fit, insert cotter key to lock nut in place. My shop manual gives two alternatives to adjusting the “float” of the bearings: one that requires a measuring instrument and another that uses “feel.” Of the two, perhaps the measuring procedure has been done a couple of times in the history of the world, but the adjustment-by-feel method is probably the most used. Adjustment-by-feel entails tightening the castellated nut to a certain point and then backing off of that point a fraction of a turn. The correct “float” according to my workshop manual is 0.003 – 0.005 inch (0.07 – 0.13 mm). The manual says that adjustment-by-feel entails tightening until there is no “float” — the hub feels “sticky — and then loosening the nut “between one and two flats” to expose the hole on the stub axel for the cotter key. (My workshop manual uses the term “split pin” for “cotter key.”)
The completed assembly. A few things are lacking for the front suspension, most notably, the anti-roll bar and, of course, the brakes. At this point it does in fact look like a front end again!
Actually getting the cotter key in place is a real trick. The cotter key that came with my kit was actually slightly larger than the hole it was supposed to fit into. I was able to narrow the key by some deft work using my wire wheel on my grinder. It didn’t take much, obviously. (I cleaned the hole, too, with a drill bit.) You will need to bend the cotter key at two points, roughly in thirds along the key.Make the bends about 140°. You can also gently bend the whole cotter key into a curved shape about a quarter of a circle. These bends will make it possible for you to get the key into the hole on the stub axel end. Once you get the key into the hole, you shove it through and straighten the key while it’s in place. After the key is in place, you bend the halves of the key around the castellated nut, locking the nut into place.
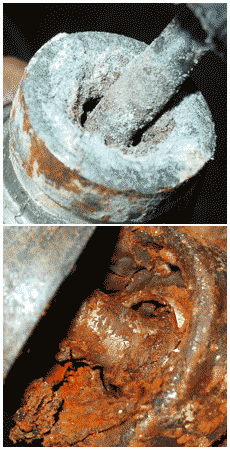 expected. It is very nearly identical to the original. I decided to take a look at the other master cylinders for the brakes before ordering replacements. One has already been resleeved in brass, and it was bright and shiny without a score mark. The plunger and various innards need attention, though. The other one seemed never to have been touched and was much worse off. Although much of the inside of the cylinder was clean, there were score marks concentrated in one area. It needs either replacement or resleeving. I emailed Terry’s Jaguar to see if they do resleeving and to see whether the metal internals are included in the master cylinder kits. Jerome replied that they don’t resleeve and the kits include only the rubber seals and the “dust cover.”
  So, at this point, I think I can use a master cylinder rebuild kit for the good, already resleeved master cylinder. I will simply cannabalize the best metal internals from the two cylinders. I’ll probably go with a new master cylinder for the other.
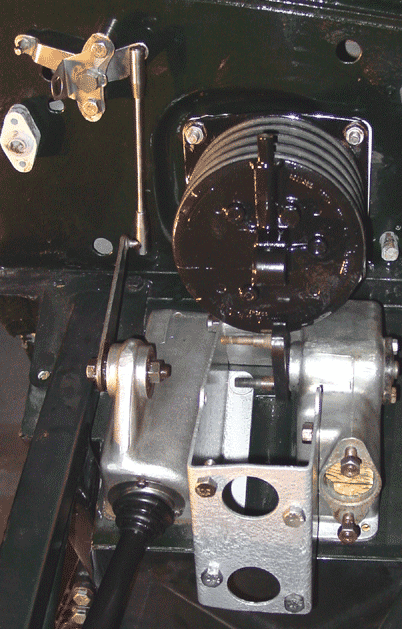 it barely survived the 3.8 liter engine version of the car. The bellows themselves were manufactured by Dunlop, and the whole arrangement has been characterized as somewhat unconventional. But I have to admit that it seems pretty straight-forward, even though the 4.2 setup (from Lockheed, I think) is said to have provided about 40% better assistance with braking. The bellows system does appear not to be as scrupulously backed up and redundant as the 4.2 brakes. I considered upgrading to the newer system, which was carried over through the remaining history of the E-type, more or less intact, if I recall right. But I decided the pedal and braking installation was too visible to replace. I’d look at it and think it was too much of a compromise from the old 3.8 Series I.
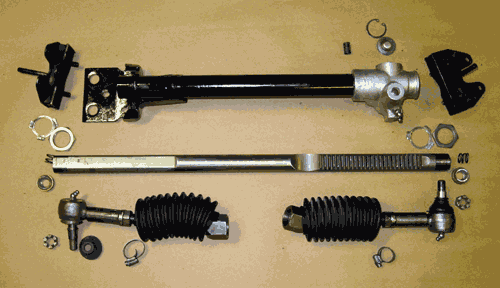
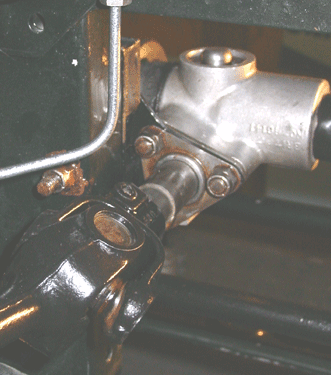
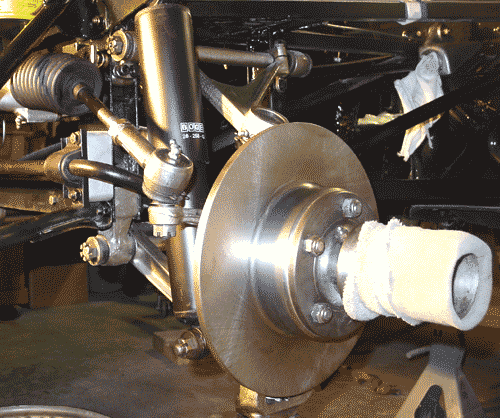
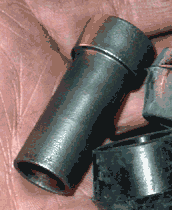
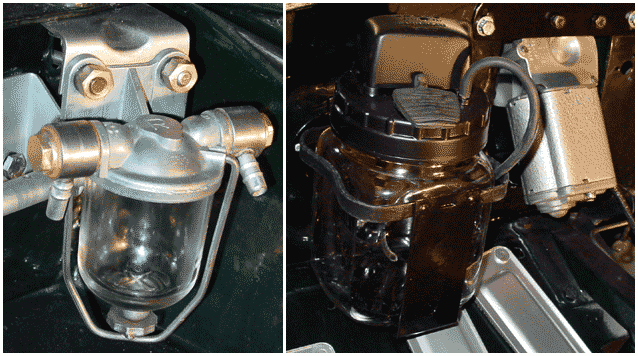
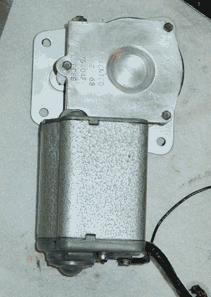
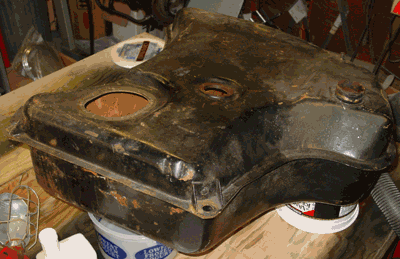
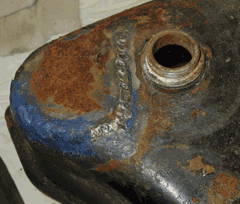
 The instructions for the tank kit said to clean the tank with the “Marine Clean” detergent, diluted 1:1. I decided to use some regular old “industrial degreaser-detergent” (purchased from Costco) to do the initial cleaning. This entailed sloshing around a 1:1 mixture of water and degreaser. I did this three times, and I let the detergent soak for about an hour in the tank. The first time the mixture came out a coffee-colored liquid. After a clean water rinse and another Costco-brand slosh, the detergent had done as much as it could. It came out almost completely the color it went in. The picture above shows the results on the interior — there were some results but the best was yet to come.
 The picture shows the last Costco-brand detergent and the first “Marine Clean” detergent mix. It’s pretty obvious that the Costco detergent had done its best. And the “Marine Clean” — which went in completely colorless — came out quite brown. The “Marine Clean” detergent is claimed to remove fuel residues and varnishes that appear in fuel tanks and fuel lines. I was skeptical, but I was pleasantly surprised by the result, especially after I had cleaned up as best as I could with other detergent.
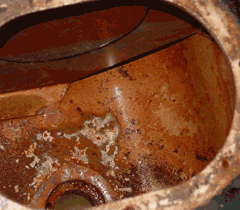 This shows the tank floor after two applications of the “Marine Clean” detergent. Although the instructions said that the final detergent soaking would pour out almost clean, that was not my experience. That second soak came out brownish, too. I’m assuming this second application was adequate, since a third quart of “Marine Clean” did not come in my kit, although the instructions mention a third application of the diluted detergent. What is shown here really amounts to a thin coating of rust. I could easily rub it off with my fingertips.
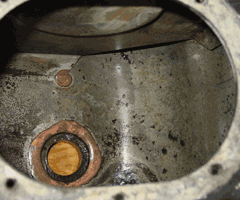 After the inside is free of greases, oils, and varnish, the rust is converted with a product called “Metal Ready.” Basically, this converts iron oxide rust and etches the metal surface. This left (or, perhaps more accurately, replaced) the rust film with a grey film that came off just as easily as the rust. This picture shows the treated surface after it had been rinsed with clean water. The surface came quite clean, since you can see the brazed welds quite easily and the steel looks like steel.
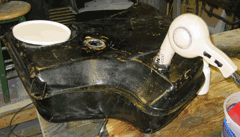 An old hair dryer served as the forced air source. It was perfect, since I just shoved it in a hole and turned it on. For the most part, I kept the dryer running without using the heater. Hot air went in about three hours all told, and it definitely heated the tank. Overall, I ran the hair dryer about ten hours. Completely drying the inside of the tank is very important, and the kit instructions especially stress this. The tank sealer will not adhere to a wet or moist tank wall.
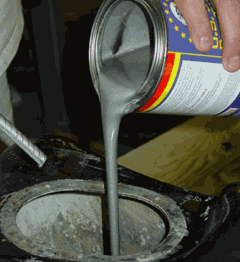 The POR-15 kit comes with a quart of fuel tank sealer, which looks to me to be the same stuff as POR-15 metal coating. Stinks the same, at least, and it looks pretty much the same, too. We duct taped the openings on the gas tank, poured the sealer into the very dry tank, and rotated it to make sure that the coating covered the entire interior surface. After that, we poured the excess out — about a pint remained. The kit instructions said to leave the can open, so that it wouldn’t explode (!), and that does make me think that the sealer is somehow different from POR-15 metal coatings, since those are resealable, at least for short term.
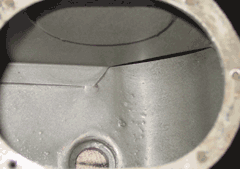 The inside of the tank now looks like this. The POR-15 instructions say that you can repair larger holes with a fabric-like product and POR-15 sealer applied to the outside of the tank over the holes. Thank goodness we won’t need to do that kind of thing!
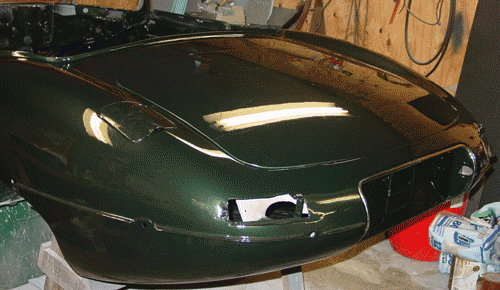 and then finally be buffed to a fine shine.
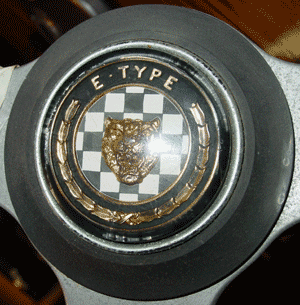
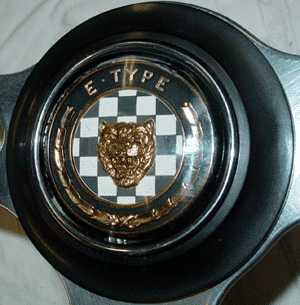
 of the steering wheel would be salvagable. At least the wood was very nearly complete — though a splinter of wood about four or five inches long and about an eighth-inch wide was missing between about 10 and 12 o’clock on the wheel perimeter. In this section, the aluminum steering wheel substrate was exposed. That section I chose to fill with “mahogany” wood filler, and the jury’s still out on what it will look like completely refinished. (I’ll post a picture when I get the polyurethane applied completely.)
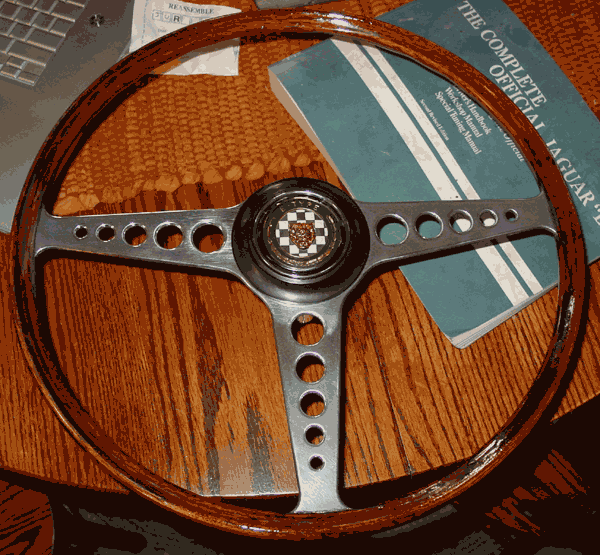
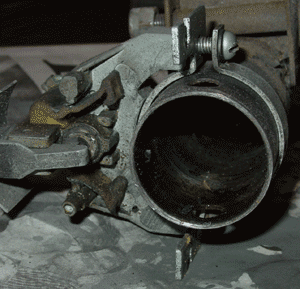 The larger picture shows the indicator switch — such as it was — on the steering column. It’s attached with a bracket setup that wraps around
  the outer tube of the column. The old switch clicked into place for left turns, but the right turns would not hold, making it necessary to hold the switch in place. The trouble was the nylon fitting that was cracked on the side that affected the right. We completely disassembled the switch and discovered some pretty badly burnt points and worn plastic (Bakelite?) housings. In short, the indicator switch is pretty much junk. It’ll be entirely replaced.
 When we picked up the car, the steering column shaft was noticably shaky in the tube. This was because a previous owner didn’t bother to replace the felt bushes but instead rigged up a plastic arrangement. This “bush” was mounted centrally on the column (a great pivot, of course), fashioned from a plastic bottle cap, and affixed with electrical tape. In order to reduce drag, I suppose, the entire shaft was smeared with grease. It is actually amazing that the shaft didn’t bind firmly in the tube, because the electrical tape easily unravelled.
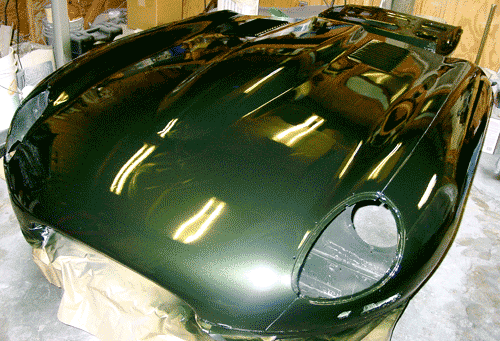
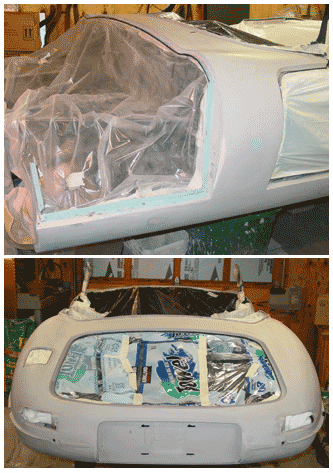 In July, I sprayed the final coat of high-build primer, and then I pretty much let it sit. The only preparation was sanding the wings lightly with a flexible styrofoam sanding board and them paying much more attention to the sills. I used the long sanding board on the sills, and this final prime/block-sanding took out the last of the ripples.
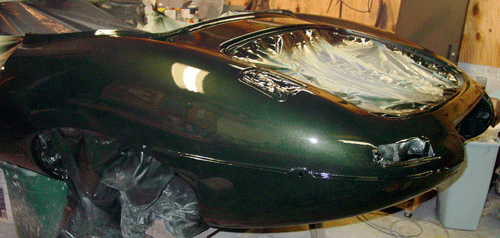 leave them on too long. I will admit that I have run into very old dried masking tape that’s been a bear to get off without damaging the underlying paint.
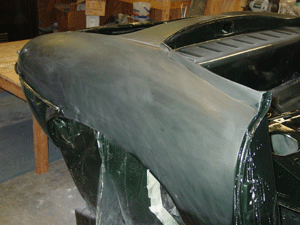 the primed surface with clean water, which I then dried with lint-free towels. This left the surface without any dusty primer residues from sanding. Next I used a “liquid deglosser/degreaser” that I have seen remove oils and grease quite effectively. I picked it up at Lowe’s so it is not anything special — just a typical brand. The degreaser is quite volatile, so it evaporates quickly. Then, after about an hour or so wait, on goes the sealer. The process is the same as
 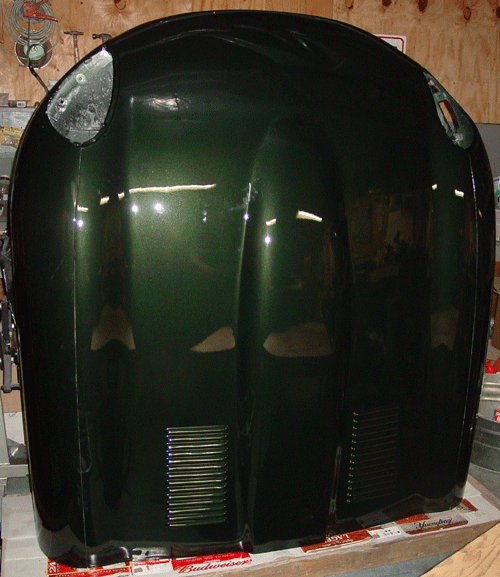 troubles before we finished the job.
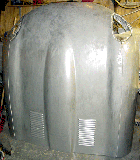 They were unfortunately not visible at the time we set the bonnet on the sawhorses.
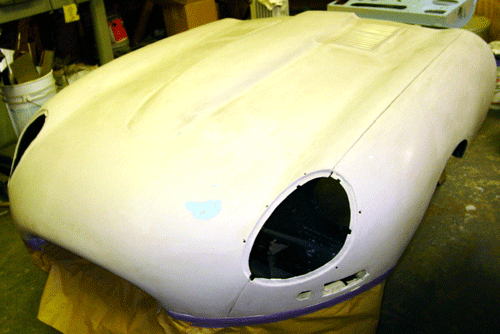
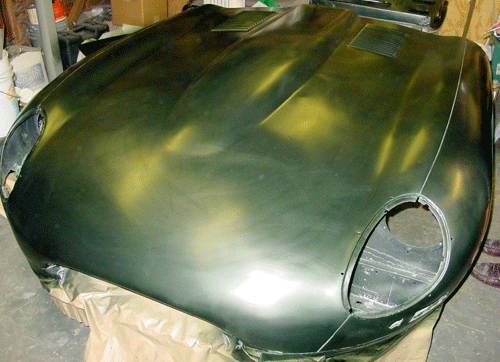
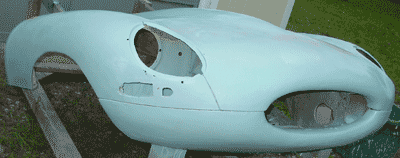 It was, I suppose, rather uneventful, except for the fact that it meant that the car was closer than ever to supporting itself on four wheels. For that matter it was closer to the ground than it had been for over a year — on
 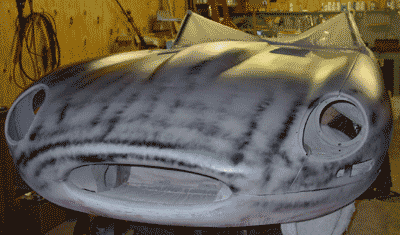 that would get some attention from the sanding block.
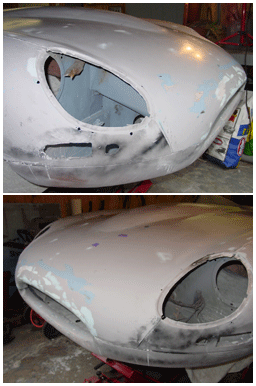 nose pictures you can see several shades: spots of exposed metal are dark, a pinkish color is body filler used after hammering out the metal, light blue (almost white) is “Easy Sand,” sky blue is “Tie-Coat” primer and the grey is the two-part high-build primer. I put three small pieces of purple masking tape on an area of concern: a gentle dip on the left side of the “performance bulge.” This place will get a little extra high-build when I next spray it. This is a barely perceptible dip that I think can be eliminated without too much of a buildup of primer, especially since the area surrounding it has been brought down with block sanding.
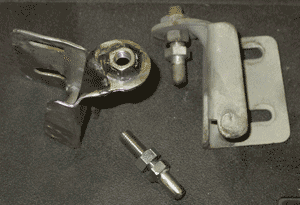 bad impact to the right front side of the car at some point. My guess is that the peg was either ripped off at that time or the bracket and the peg were severely bent and they eventually weakened and fell off, or were simply torn off to get them out of the way. Blame a previous owner. I could have located a replacement, but I decided to repair the original with a washer and some deft welding and grinding. I also fashioned a new peg that is very close to the peg on the intact left side latch bracket. I am now thinking that I will plate the pegs with zinc and paint the brackets with a metal/aluminum paint. The pegs will need to have a durable, abrasion-resistant coating.
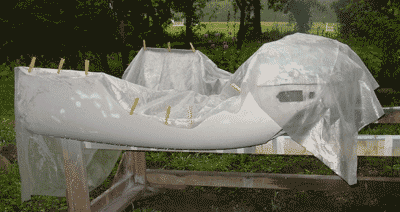 But I could not do the blocking over the channels as I had hoped. The structure itself was too fluid and loose, and so it was apparent that I had to fit the bonnet internals more permanently in order to work with the outer lines of the bonnet.
 that it was better to fashion new flanges than to try to fill the gap, so to speak, with adhesive. Apparently using an excess of adhesive is common practice, but I think it would look tacky and probably not be as stable as customized — and (I know) non-standard — flanges. So we put the last bits of the 20-gauge steel to use. (Historical note: Aaron and I fashioned the new flanges, but we also used one welded up by John Boutin when he and his family visited us back during Thanksgiving vacation 2003. He wanted to try his hand at welding and that was his project. The flange now sits in the forward right position, holding the right side duct nearest the bonnet mouth.)
 Mike Moore, a two-time Jag E-type restorer in California, gave me particulars about getting the Sikaflex adhesive that is “original” for the E-type bonnet. Mike says it is very good stuff. Nonetheless, I decided to go with a polyurethane adhesive, since I had read in a post from Dan Mooney (of Classic Jaguar) that a good polyurethane adhesive would do the trick. Besides, I could obtain that nearby.
 we have really needed the rain). That is to say: moving forth with the bonnet while it’s perched (and covered) outside has been a little hit-or-miss. I’ve been reluctant to paint when rain threatens, of course. Priming has been a bet with the weather, but by the end of the month the bonnet internals got a coating
 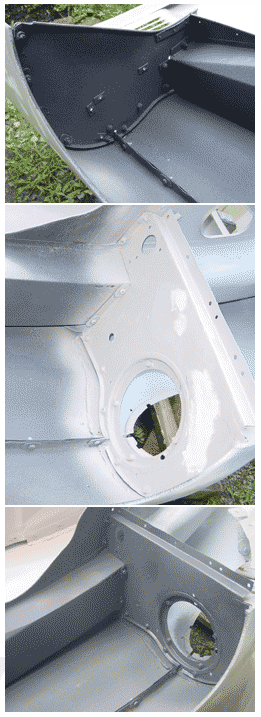 of “Tie-Coat” primer and the two-part high-build primer. Also, the front wheel wells were coated with rock guard. Inadvertently, the rock guard ended up a two stage process, in part because our Internet connection went out after a power outage and I couldn’t consult the well illustrated “FAQ” on applying “underseal” that is posted on
 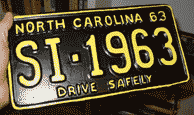 bad about it. I manufactured a completely bogus 1963 North Carolina license plate with some old Plexiglass, a handful of modelling clay, some plaster of Paris, Bondo (the cheap kind), and some paints found in the garage. The process was simple: Using the plexiglas as a base, I fashioned the raised letters and numbers with the modelling clay, making the side bevels a bit more gradual than the eventual product. This allowed for some material for shaping. After applying a bit of dishwasher soap and water to the Plexiglas and clay plate, I poured plaster of Paris over the plate. This made a mold. After the mold had set, I applied Bondo to the mold, and embedded a piece of wire screen for strength — an entirely good “blodger” practice. I had to break the plaster apart to remove it from the Bondo, in spite of the soapy lubricant. Final shaping was with sandpaper.