This entry begins the third year of restoration work on the old car.
Clearcoat and boot lid installation
The car body was completely sanded smooth with 800 grit sandpaper, and ripples and “orange peel” areas were smoothed out. The surface was then degreased and coated with another double coat of clearcoat. This final clear coat will undergo the “color sanding” process 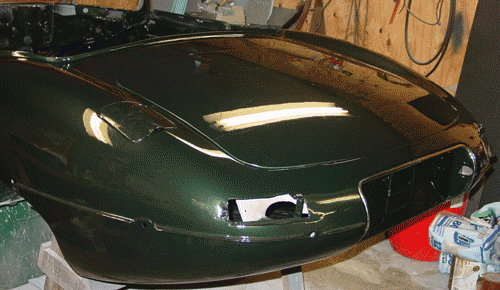 and then finally be buffed to a fine shine.
We painted and clear coated the door exteriors and the trunk (boot) lid, too. The boot hinges were painted some weeks ago, and they had been awaiting reassembly. I had a number of boot hinge springs that had broken, and I replaced those with new ones using a modification of the methods that have been described by George Cohn (on the Jag Lovers forum) and Classic Jaguar. They are good descriptions and entirely predictable, in that there aren’t very many ways to do the job. One thing I did do that wasn’t listed in the directions was grease between the individual springs. Although the springs don’t do an incredible amount of rubbing, I did notice evidence of wear on my old springs (which were not greased). I figured that adding a smattering of grease probably would alleviate a little friction over time, though at the expense of introducing grease into a storage area. I suspect that the original springs were not greased simply because Jaguar drivers didn’t really want luggage and storables stained with grease. And that would be a hazard of greasing boot lid hinge springs.
The E-type is not a remarkably wondrous vehicle for transporting much other than two passengers, so I wasn’t going to worry about an occasional grease stain.
Once you install the hinges and attach the lid, you almost have to install the latching mechanism. E-types have a release fitted on the rear bulkhead in the car’s interior. There was no lock on the early Series I cars — that was introduced, I believe, with the late 3.8 liter cars or with the introduction of the 4.2 liter engine. On my car, you just pull the knob and the lid pops up. As far as I can tell, there isn’t an easy way to release the trunk lid if the cable attached to the knob and the latching mechanism fails. You’re basically stuck, or you have to be very adept with needlenose pliers stuck through the holes for mounting the rear license plate.
My latch required little more than a good cleanup and a little black paint. The part of the latch that attaches to the lid itself was in exceptional shape, with the cadmium plate in fine polish. After all, it was protected from the elements and had been painted body color at some time.
Once the latch was fitted, the trunk could close and reveal some of the fine shape of the E-type. I couldn’t help myself — I had to attach the chrome surrounds for the license plate recess, just to get a little better picture of the rear. The doors, you might note, also are temporarily hung in place. I needed to get them out of the way, and the body shell seemed a good place to store them!
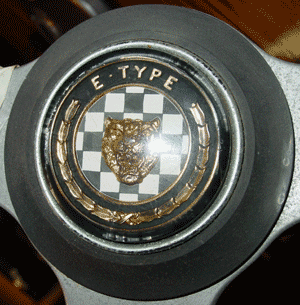
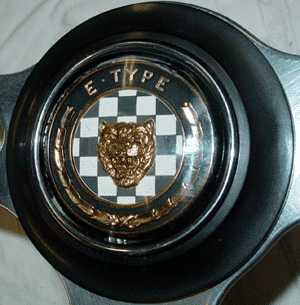
Steering wheel
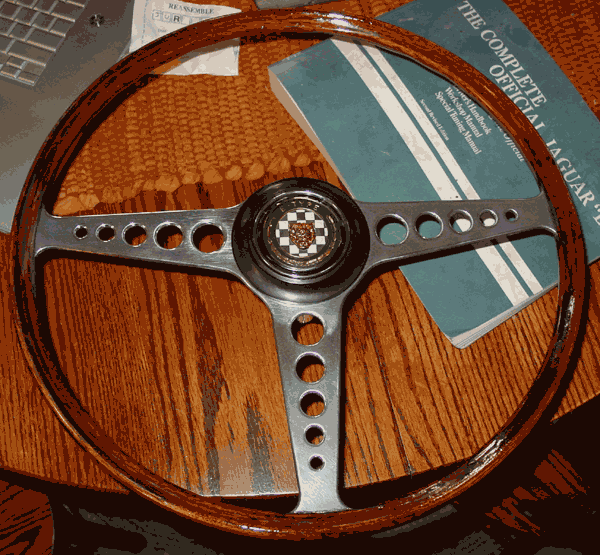
Most car restoration, it seems to me, involves some form of rubbing. You can’t get away from it, even after having put in your time rubbing and sanding the body before and after painting. Even the steering wheel took its toll on my elbows, or at least required a bit of attention from my cloth polishing wheel and some compound.
The horn button comes off of the steering wheel by loosening three set screws. Once these are loosened, the horn button comes right off. Dissasembling the steering wheel from the “boss” (the aluminum cylinder that attaches the wheel to the column) means drilling out aluminum rivets. I do not plan on re-riveting the wheel to the boss, so I’m replacing them with screws and bolts. (This is a very common practice, I have learned.)
All of the aluminum on this car has some severe aluminum oxide corrosion, and the steering wheel seemed especially to suffer from it. I used 800-grit sandpaper to remove the bulk of the corrosion, and then I used a cloth buffing wheel with coarse grit to get the remainder cleaned. A single attack on the aluminum portions of the wheel was not enough. I had to go at the whole thing again with 800-grit sandpaper and buffing before things were in shape. Thet pictures of the horn button, by the way, show the wheel in mid-restoration, not final. I’ll update with other pictures, probably when things move along with the steering column and dash assemblies.
The steering wheel itself had some fairly severe cracks, and for the most part the varnish had deteriorated to the point that it had completely flaked off. I was thankful for the residues that remained, but it wasn’t entirely clear at the outset whether the wood sections  of the steering wheel would be salvagable. At least the wood was very nearly complete — though a splinter of wood about four or five inches long and about an eighth-inch wide was missing between about 10 and 12 o’clock on the wheel perimeter. In this section, the aluminum steering wheel substrate was exposed. That section I chose to fill with “mahogany” wood filler, and the jury’s still out on what it will look like completely refinished. (I’ll post a picture when I get the polyurethane applied completely.)
For the crack repair, I used an approach that was suggested on the Jag Lover’s Forum: using cyanoacrylate filler to bond and fill steering wheel cracks. It worked nicely, and I just used the glue that I found at Lowes. Unlike the “Super-Glue” adhesive, this stuff was thicker than the watery stuff I’d used before as a cement. It flowed well enough into cracks, but it did bead up after I reapplied it to an already filled crack. The watery “Super-Glue” would just have spread. Because the adhesive bonds very quickly, I clamped the crack as tightly as I could before applying the glue. Even when the crack virtually disappeared under pressure of the clamps, the glue found and soaked into the crack quite easily. Because cyanoacrylates use hydroxyl ions (in water) to begin bonding, I used my breath to add moisture to the wheel before clamping a crack and applying the glue.
Sounds a little weird, but it works. (Arlene and my daughter thought it was strange for me to blow into the steering wheel.)
Cyanoacrylate is exceptionally tough stuff. It quickly soaked into the cracked wood and bonded. The areas that built up some glue were devilishly hard to sand down. After the sanding, I applied a coat of clear polyurethane, followed by light sanding and a reapplication of polyurethane. As of this writing, I’ve applied three coats of polyurethane in this fashion, and I believe that one more will be required. I’ve inserted a picture of the entire steering wheel, with the horn button laid in place. (Since it’s a large picture, I lowered the color palette, and that makes things look a little botchy.) The aluminum still needs a little work (already started, to judge from the scratches that are visible), and the wood needs sanding and another coat. By the way, the void that I had to fill is on the reverse side of the wheel, thank goodness.
Steering column and indicator switch
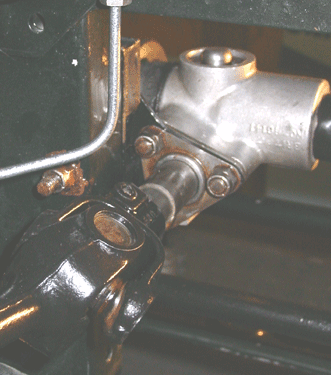
The steering column lacked a couple of items, and the indicator light switch was faulty. Beyond that, the indicator switch lever was badly corroded; what was originally chrome had become little more than a rusty stick with flakes of chrome loosely hanging on it. 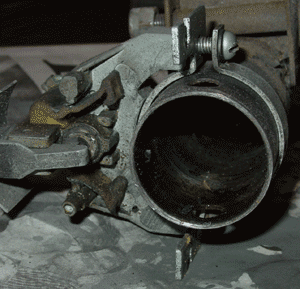 The larger picture shows the indicator switch — such as it was — on the steering column. It’s attached with a bracket setup that wraps around
 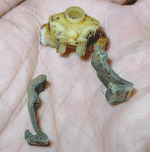 the outer tube of the column. The old switch clicked into place for left turns, but the right turns would not hold, making it necessary to hold the switch in place. The trouble was the nylon fitting that was cracked on the side that affected the right. We completely disassembled the switch and discovered some pretty badly burnt points and worn plastic (Bakelite?) housings. In short, the indicator switch is pretty much junk. It’ll be entirely replaced.
The steering column consists of two major parts: an outer tube and the shaft. The shaft is held in place by two bushes, one at the top of the tube and the other at the bottom. The bushes are available in felt or plastic. I went with the plastic versions, in spite of the fact that the originals were felt. The felt bushes are sandwiched by washers and held in place by a wire circlip that snaps into holes on the top and bottom sides of the outer tube. The plastic arrangement is much simpler, since the plastic ring simply snaps into place in the holes. (The holes for the upper bush are visible in the picture on the left.) The two bushes have unequal inner dimensions. The lower bush is smaller than the upper one, since the shaft tapers in stepwise fashion from top to bottom.
 When we picked up the car, the steering column shaft was noticably shaky in the tube. This was because a previous owner didn’t bother to replace the felt bushes but instead rigged up a plastic arrangement. This “bush” was mounted centrally on the column (a great pivot, of course), fashioned from a plastic bottle cap, and affixed with electrical tape. In order to reduce drag, I suppose, the entire shaft was smeared with grease. It is actually amazing that the shaft didn’t bind firmly in the tube, because the electrical tape easily unravelled.
I took pictures of the plastic replacement bushes, but (alas) they are stuck on my digital camera. The dongle has disappeared from the household, and of course no one has any idea where it is. When it reappears (soon, I hope), I’ll post a photo of the bushes.
‘Til then….
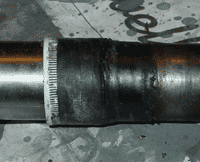
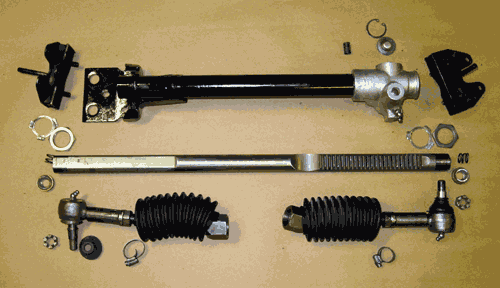 rubber parts on the steering assembly were trash, the rest of the parts were in good shape. I had to replace the mounting brackets (a “Metalastic” rubber-and-metal assembly) as well, since the originals were a bit cracked and stiff. The tie rod ends, with their ball joints, were in good shape and had no evidence of bad wear or rust. The toothed rack was pure uncorroded steel. The tie rods themselves were in good shape, and the separated from the tie rod ends with a little effort, some penetrating oil, and some tapping with a hammer. Even though the previous owners of the car repaired rust poorly, they seemed to know how to keep things greased up. I think the grease spared the steering from rusting.