Moving car shell off rack, bonnet again (17 – 23 July)
The weekend of 17-18 July was mainly devoted to lowering the car shell from the wooden rack, cleaning the garage, and moving the bonnet outside. 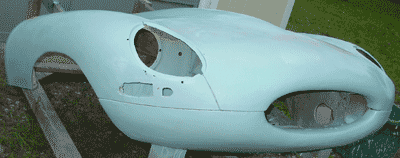 It was, I suppose, rather uneventful, except for the fact that it meant that the car was closer than ever to supporting itself on four wheels. For that matter it was closer to the ground than it had been for over a year — on 15 March 2003 the car went up on its wooden frame.
We moved the wooden frame out of the garage and then moved the bonnet from its corner to perch on the wooden rack. I can cover it with a tarp to protect it from the elements until it’s ready to move back into the garage. Actually, the bonnet has moved in and out of the garage during the last half of July, since we’ve taken it out to spray primer and have better access to the internals and such. And then we’ve moved it back into the garage in order to fit it to the body shell.
The bonnet had received the occasional final brush full of “Tie-Coat” primer when I was busy doing other things, but once it made it’s way out of the garage it has become more of a focus of our attentions. I finally sprayed it with “Tie-Coat” and this was the first and last of such stuff on a good portion of the bonnet. I wanted to use more mainline primer on the bonnet, since it worked so well on the body shell. The “Tie-Coat” cured for a couple of days, and then I went over it very quickly with a sanding block to remove the drips and such. Then I sprayed a good Dupont two-part high-build primer. This was really the first “working” coat of primer — one 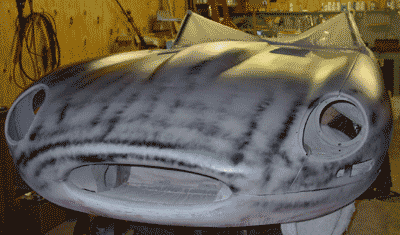 that would get some attention from the sanding block.
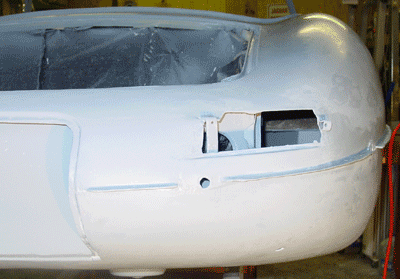
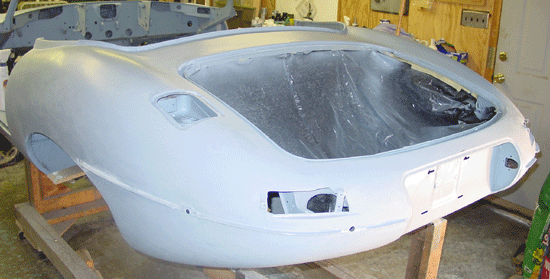
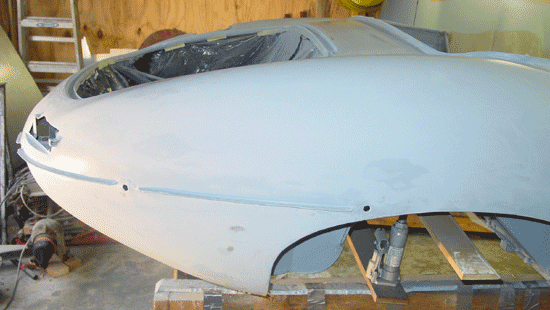
As with the other blocked primer coats, this one got a “guide” coat of spray paint, this time a black gloss because it was the only spare can of paint I had on hand. I’ve found that the Rustoleum “rusty metal” primer is a good guide coat paint, since it doesn’t build up in sandpaper. I didn’t have any available, though. The bonnet nose finally looks as though it is getting into final shape. (Somehow, I feel that I have said or thought that before with the bonnet.) Once again, I have shaved off and tapped metal a bit on the right side. This has the good effect of removing body filler, but it seems a bit late in the game to be shaping the nose even still. Some final dings I have filled with Evercoat “Easy Sand” filler (good stuff!). If you look closely at the bonnet 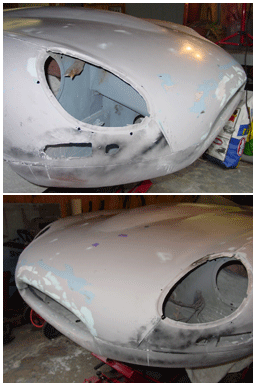 nose pictures you can see several shades: spots of exposed metal are dark, a pinkish color is body filler used after hammering out the metal, light blue (almost white) is “Easy Sand,” sky blue is “Tie-Coat” primer and the grey is the two-part high-build primer. I put three small pieces of purple masking tape on an area of concern: a gentle dip on the left side of the “performance bulge.” This place will get a little extra high-build when I next spray it. This is a barely perceptible dip that I think can be eliminated without too much of a buildup of primer, especially since the area surrounding it has been brought down with block sanding.
Bonnet hardware
Quite a while ago I had zinc plated parts of the bonnet latch brackets that attach to the body shell and accept the latch “peg” from the bonnet. I had to repair the parts of the side latches that attach to the bonnet and hold the pegs that fit into the holes on the brackets. I believe these are called “bonnet locating pegs” and “bonnet lock brackets.” The single remaining rubber bonnet locating peg pad is exhausted, so I’ll need to get new ones. They look like special parts, and I don’t think I’ll be able to find a “generic” equivalent. These rubber parts fit around the pegs and keep the metal latch brackets from banging metal-to-metal.
The right side latch bracket that fits onto the bonnet was broken at the point where the locating peg was attached. This seems to be further evidence of a rather 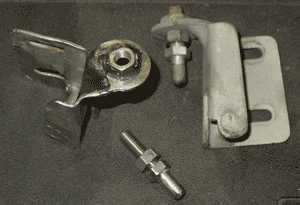 bad impact to the right front side of the car at some point. My guess is that the peg was either ripped off at that time or the bracket and the peg were severely bent and they eventually weakened and fell off, or were simply torn off to get them out of the way. Blame a previous owner. I could have located a replacement, but I decided to repair the original with a washer and some deft welding and grinding. I also fashioned a new peg that is very close to the peg on the intact left side latch bracket. I am now thinking that I will plate the pegs with zinc and paint the brackets with a metal/aluminum paint. The pegs will need to have a durable, abrasion-resistant coating.
The latches really helped in fitting the bonnet to the car body, since they keep alignment and support the outer rear wings in place while you adjust the bonnet mounts at the bonnet hinges. When I had previously (and grossly) fitted the bonnet (see the earliest attempt in August 2003 and the most recent in March 2004), I had not used the latches, since these were, after all, gross fittings. My main intent was to see how well the rear section of the bonnet met the front bulkhead. But at this point I was more interested in seeing how the outer lines of the bonnet fit the outer lines of the body shell, and so I needed to be more discriminating in the fit.
The more discriminating fit was, well, merely all right. The side panels met better on the left side than the right side, and the gross geometry overall was in good shape. 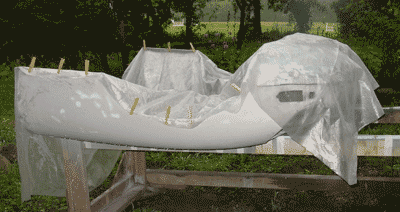 But I could not do the blocking over the channels as I had hoped. The structure itself was too fluid and loose, and so it was apparent that I had to fit the bonnet internals more permanently in order to work with the outer lines of the bonnet.
Bonnet internals glued and primed (25 – 31 July)
So, the bonnet came off and was returned to the rack. This time it went on upside down, though, in order to give easy access to the inside of the bonnet. I had not yet glued the flanges to to inside of the center section of the bonnet. These flanges hold the two ducts in place and overall provide internal support to the bonnet structure. My flanges fit very badly, leaving as much as about a half inch (one centimeter and some) of a gap toward the front of the bonnet. I decided 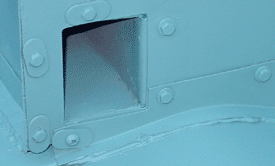 that it was better to fashion new flanges than to try to fill the gap, so to speak, with adhesive. Apparently using an excess of adhesive is common practice, but I think it would look tacky and probably not be as stable as customized — and (I know) non-standard — flanges. So we put the last bits of the 20-gauge steel to use. (Historical note: Aaron and I fashioned the new flanges, but we also used one welded up by John Boutin when he and his family visited us back during Thanksgiving vacation 2003. He wanted to try his hand at welding and that was his project. The flange now sits in the forward right position, holding the right side duct nearest the bonnet mouth.)
 Mike Moore, a two-time Jag E-type restorer in California, gave me particulars about getting the Sikaflex adhesive that is “original” for the E-type bonnet. Mike says it is very good stuff. Nonetheless, I decided to go with a polyurethane adhesive, since I had read in a post from Dan Mooney (of Classic Jaguar) that a good polyurethane adhesive would do the trick. Besides, I could obtain that nearby.
We glued the flanges to the metal after cleaning up the lines well. The polyurethane adhesive was certainly messy, but it set in about 24 hours. Pictures I had seen of the glued pieces show that the glue was applied generously and bulges out from the joint. Ours looks pretty standard in that regard. The polyurethane glue we used is tough stuff after it’s dried. Like what I’ve heard about Sikaflex, it is somewhat flexible, but quite resistant to movement. It is not “rubbery.”
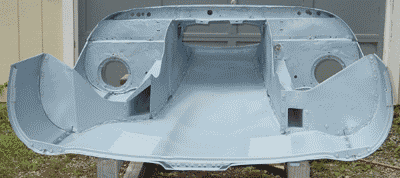
North Carolina has periods of summer rains that occur regularly in the afternoon. Since mid July it has been a little wetter than the earlier part of the month (though 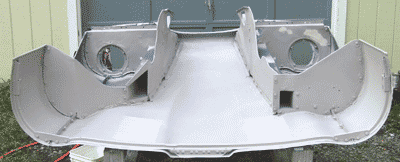 we have really needed the rain). That is to say: moving forth with the bonnet while it’s perched (and covered) outside has been a little hit-or-miss. I’ve been reluctant to paint when rain threatens, of course. Priming has been a bet with the weather, but by the end of the month the bonnet internals got a coating
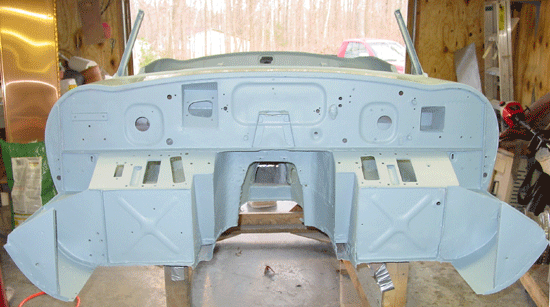
 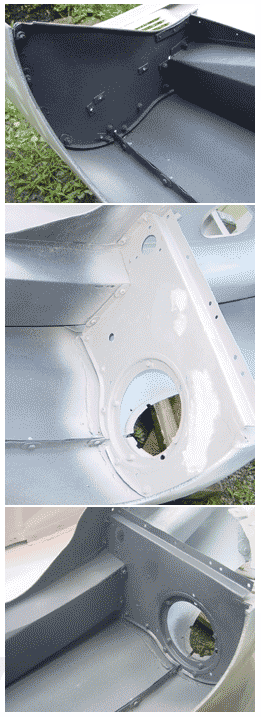 of “Tie-Coat” primer and the two-part high-build primer. Also, the front wheel wells were coated with rock guard. Inadvertently, the rock guard ended up a two stage process, in part because our Internet connection went out after a power outage and I couldn’t consult the well illustrated “FAQ” on applying “underseal” that is posted on Classic Jaguar‘s web site.
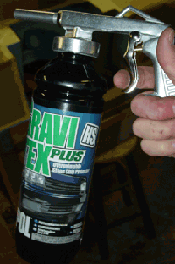
Anyway, I initially left the frontmost section of the front well well without rock guard, since I have pictures of a restored Jaguar without rock guard. I went ahead and smoothed out some ripples on both of these sections, thinking that they were going to be smooth and painted. When RoadRunner came back up, I checked the FAQ on Classic Jaguar. Sure enough, the front portion also gets rock guard, according to Dan Mooney. The more I though about it, the more I recalled removing rock guard from that part of the bonnet, too. (I should say that I have learned not to trust anything I found on this car to be particularly reliable as far as originality is concerned.) I went ahead and applied rock guard to the front section. This was hardly an aggravation. The stuff goes on easily and is an easier cleanup than having to clean up a spray gun. I again used the “Gravi-Tex” product that I used for undercoating for the IRS well, rear wheel wells, and the underside of the car. It’s significantly less expensive than the 3M Rock Schutz.
That pretty much closed the month of July. I was hoping that the car would have color by the end of July, but this is close enough. The rains of the last week or so didn’t cooperate with me. The inside of the bonnet still needs a bit of block sanding (nothing too meticulous, though) and another shot of two-part primer. Then I think we’ll refit it to the car body, and finalize the blocking.
Then … color! Maybe. I’m now hoping that August is the magical month.
Forgotten tidbit: Underside painted Opalescent Dark Green (a while ago — mid-June 2004)
I neglected to mention how I managed to paint the underside of the car. This entailed lifting the car up off the rack and moving the rack back until the rear section of the car was supported beneath the foremost section of the boot floor, just behind the housing for the IRS. The front of the car — basically at the point where the frames attach to the body — was supported by a saw horse. This left the entire mid-section of the floor completely free. And I simply painted it. I wasn’t too cramped, since the car was about four feet (a little over a meter) off the ground. (The operation did not lend itself to photography, I’m afraid.)
Of course, the underside of the car is painted Opalescent Dark Green over the rock guard.
 in abundance this winter, you just want to hunker down and get through it. So I occupied my restoration time with things that were easy to do in short and less cold moments. Little things over a long period do add up. This is a two-part addition to the restoration journal. Welcome to part one….
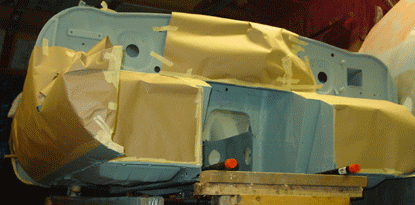
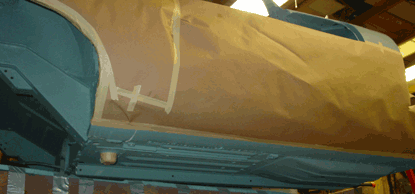
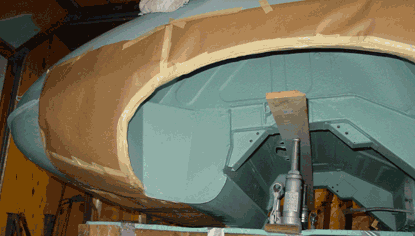
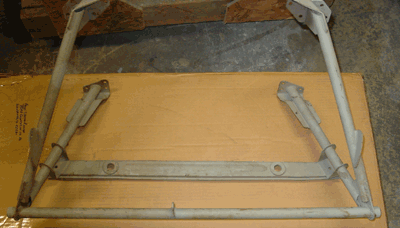 I left the undercoating for a week or so before spraying a thin coat of primer over the surface. This may have been unnecessary, but auto paint folks suggested it for good sealing and for a uniform color beneath the paint.
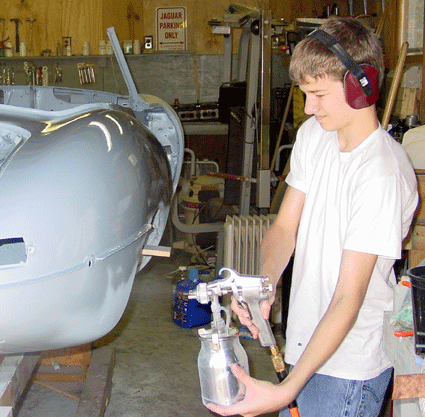 warm temperatures to open up the garage and spray the body shell with primer. The temperatures reached the mid-70s (Fahrenheit, 20+ Celsius), and so short sleeves did it, as you can see from the picture of Aaron spraying the right rear quarter panel. As everything was open and the fan was blowing, we didn’t use face masks, which probably weren’t necessary in this case. But we did wear ear protection because the compressor is so loud. In retrospect, I believe we should have worn our respirators, too.