An odd fall, this last one. Sometimes it was as warm as summer, and then, before you get too used to the nice weather, in popped a cold spell for a visit. I still have some paint touch up to do before I can turn to the final buffing and shining, but I’ll need some sustained warmth before I can swing the paint sprayer again. Now that it’s almost the turn of the year, warmth might wait ’til spring to come back.
So, over the past couple of months, I’ve done various things, mainly on the areas of the car forward of the firewall (“front bulkhead”), but also some on the interior. I’ve devoted a page to the specifics: the firewall section (this page), the front suspension, the steering setup, the pedal and master cylinder asssemblies and the rest. “The rest” means the left over of what I did, not the rest of the car, unfortunately. It includes beginning installation of sound dampener/insulation on the interior, shipping some chrome off to be redone, and beginning work on breakdown of the IRS.
Firewall Sundries
The firewall is a place for lots of individual parts, so as you go about refinishing and reinstalling them you do get the feeling that you are really moving along. The nice thing about the firewall work is that you can also tackle a complete piece in an evening or two, making for a satisfying pace. When I compare the firewall clutter on my truck (a ten-year-old Ford F-150) with the minimal stuff on the Jag firewall, the difference is amazing. There really isn’t much on the old Jag, and what was placed there seems to me to have a certain ornamental flair. (Perhaps that is a bit of bias impinging on judgment.) That simplicity comes in part from the fact that the firewall had to serve both right-hand and left-hand drive configurations. So there are many parts that are placed in a somewhat mirrored fashion, not exactly mirrored of course. This means that something like 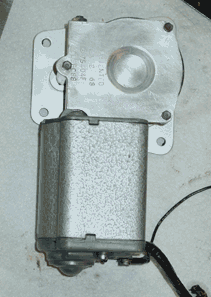 the blanking plates for the pedal assembly are required on the Jag, whereas I don’t think my pickup has anything like those. And since they’re on the Jag, they could be adorned with cadmium plate. And since the configurations are mirrored, the firewall always has some area more or less unused opposite the used space, though individual sections of the firewall are also set up so that they can accept different parts.
The first thing I took on was the wiper motor. It’s basically a steel sheel surrounding the rotor and armature with pot metal caps. A gear assembly comes off the top of the motor and contains a large nylon gear driven by a brass worm gear off the motor. The motor itself is straightforward, but the controls are a little formidable because of the requirement that the wipers “back off” and go back into their off position once the wipers are turned off. This means reversing the motor to set the wipers into their resting place.
I was a dolt and tried to make the motor move by touching wires with a six-volt battery charger. There wasn’t anything that moved, and when I thought that perhaps this was a stupid thing to do (after a couple of touches to no effect), I gave up. I asked about ways of testing the motor on the Jag-lovers forum, but apparently there’s not much to do until the switches and wires are correctly installed. I was warned about messing with battery charges and delicate wiring, though!
Putting the motor into visible order was a matter of dismantling the pieces and cleaning them up. The steel motor housing is painted a hammered silver/grey. I used a multipurpose grease on the gears. They had been greased before, and the grease had firmed up quite a bit. It wasn’t hard or rubbery, but it was old and stiff. Installation of the motor was a matter of fitting the wiper arm and sliding it into the inner part of the firewall and bolting the mounting plate. Now I can look at it and hope it will work.
The windshield washer jar and pump were original, as was the mounting bracket that attaches them to the firewall. The washer pump lacked a part that apparently sits below fluid level and is driven by the small motor mounted on the jar lid. This meant, of course, that the pump was functionally worthless, even though it looked good after cleanup and a spray of satin black paint. 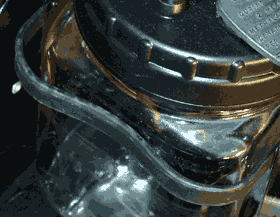 New washer pumps are available, but they don’t look like the old one I have, as far as I can tell. I decided to mount a “universal” washer pump in the area inside the firewall behind the washer fluid jar, and let it use the existing lid and tubing to draw fluid from the jar. It’ll be invisible, and it should work to pump fluid. Although I will hook up the contacts on the old pump, they won’t be connected. Instead, the real wiring will go to the new and hidden pump.
New rubber tubing was fitted. I got it from McMaster-Carr, a place that amazes me continuously. I also installed the first rubber grommet in the firewall for the washer tubing. This grommet came from the body seal and rubber kit that is offered by Classic Jaguar. I look forward to installing the rest of the rubber parts!
The mounting bracket was a bit of a job. The rubber guard on the side bars (see the closeup picture of the restored part) completely rotted and had turned into little more than a sticky goo. More rubber had deteriorated at the base of the bracket. I’m not exactly sure why it behaved this way, since it appeared to have been dissolved in some fashion. By solvents in the washer fluid, perhaps? At any rate, that had to be completely removed. After I stripped the paint on the remaining parts, I repainted gloss black, leaving the side bars unpainted. I decided to try reapplying the rubber coating with Plasti Dip, a product that is used to give tools a rubber-like grip on their handles. You usually dip parts into the product, but I brushed it on the bars. It took several coats to build up sufficiently, but the end product looks quite good. The Plasti Dip looks like it will be quite durable, too. I have loads of the stuff left.
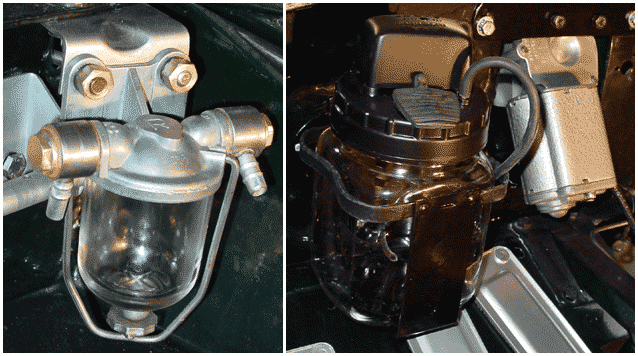
The fuel filter bowl and the bonnet latch assemblies also went on after thorough cleaning. I’ll be removing the fuel filter bowl to install the car number plate. I’m a little disappointed wth the reproduction of the car number plate. It evokes the original, but it doesn’t come too near duplicating it. The past couple of days I’ve been toying with the idea of doing my own (and more true) number plate. It seems that the people who did the reproductions could have been more scrupulous.
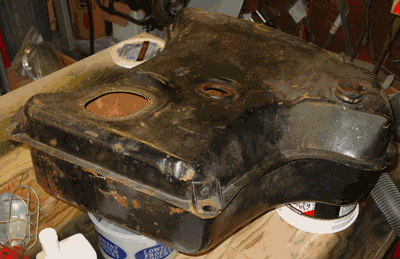
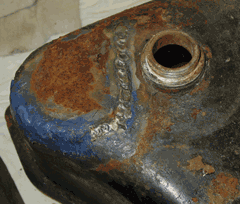
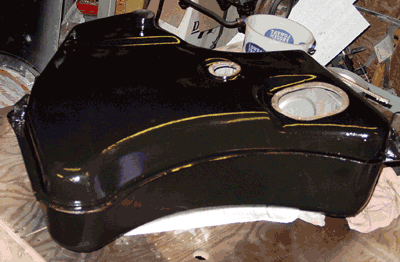
 The instructions for the tank kit said to clean the tank with the “Marine Clean” detergent, diluted 1:1. I decided to use some regular old “industrial degreaser-detergent” (purchased from Costco) to do the initial cleaning. This entailed sloshing around a 1:1 mixture of water and degreaser. I did this three times, and I let the detergent soak for about an hour in the tank. The first time the mixture came out a coffee-colored liquid. After a clean water rinse and another Costco-brand slosh, the detergent had done as much as it could. It came out almost completely the color it went in. The picture above shows the results on the interior — there were some results but the best was yet to come.
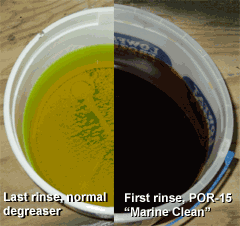 The picture shows the last Costco-brand detergent and the first “Marine Clean” detergent mix. It’s pretty obvious that the Costco detergent had done its best. And the “Marine Clean” — which went in completely colorless — came out quite brown. The “Marine Clean” detergent is claimed to remove fuel residues and varnishes that appear in fuel tanks and fuel lines. I was skeptical, but I was pleasantly surprised by the result, especially after I had cleaned up as best as I could with other detergent.
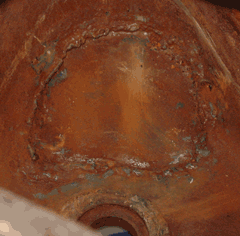
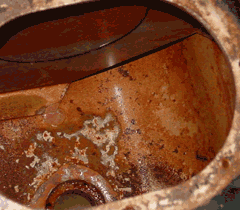 This shows the tank floor after two applications of the “Marine Clean” detergent. Although the instructions said that the final detergent soaking would pour out almost clean, that was not my experience. That second soak came out brownish, too. I’m assuming this second application was adequate, since a third quart of “Marine Clean” did not come in my kit, although the instructions mention a third application of the diluted detergent. What is shown here really amounts to a thin coating of rust. I could easily rub it off with my fingertips.
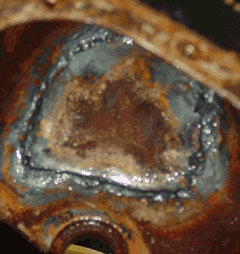
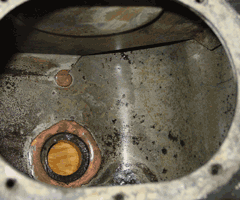 After the inside is free of greases, oils, and varnish, the rust is converted with a product called “Metal Ready.” Basically, this converts iron oxide rust and etches the metal surface. This left (or, perhaps more accurately, replaced) the rust film with a grey film that came off just as easily as the rust. This picture shows the treated surface after it had been rinsed with clean water. The surface came quite clean, since you can see the brazed welds quite easily and the steel looks like steel.
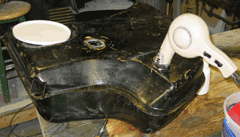 An old hair dryer served as the forced air source. It was perfect, since I just shoved it in a hole and turned it on. For the most part, I kept the dryer running without using the heater. Hot air went in about three hours all told, and it definitely heated the tank. Overall, I ran the hair dryer about ten hours. Completely drying the inside of the tank is very important, and the kit instructions especially stress this. The tank sealer will not adhere to a wet or moist tank wall.
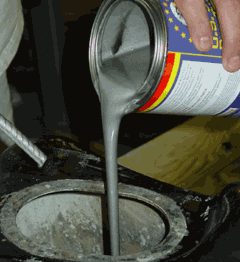 The POR-15 kit comes with a quart of fuel tank sealer, which looks to me to be the same stuff as POR-15 metal coating. Stinks the same, at least, and it looks pretty much the same, too. We duct taped the openings on the gas tank, poured the sealer into the very dry tank, and rotated it to make sure that the coating covered the entire interior surface. After that, we poured the excess out — about a pint remained. The kit instructions said to leave the can open, so that it wouldn’t explode (!), and that does make me think that the sealer is somehow different from POR-15 metal coatings, since those are resealable, at least for short term.
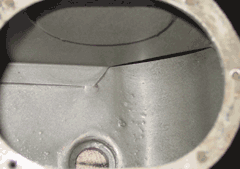 The inside of the tank now looks like this. The POR-15 instructions say that you can repair larger holes with a fabric-like product and POR-15 sealer applied to the outside of the tank over the holes. Thank goodness we won’t need to do that kind of thing!