Bonnet POR-15
It may have been Thursday night, I forget. Anyway, the forecast for the weekend was rain again, and I wanted to get the bonnet center section and wings sealed with POR-15. So I did that on Thursday night, with the center section in front of the garage and the wings nestled inside the garage. 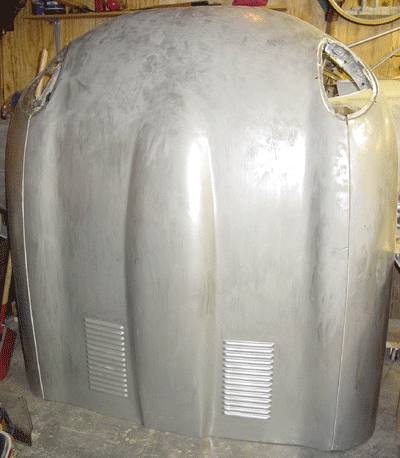 I learned a lesson any schoolboy already knows: if you paint at night under the sky, insects get into the wet paint. And, yes, they did: loads of small gnats drowned in the POR-15 paint. I was able to put two coats of POR-15 on before I ran out. On Friday night I sanded the areas of the bonnet where fly lumps appeared, and now the bonnet is pretty smooth. It is definitely not ready for primer, though. Aaron and I will have to take out the unfortunate lumps and grooves that remain even still. It is almost to the point when a primer and block sanding will take care of everything, but now that the entire construct is a metal-silver it’s much easier to see what might need some more attention. We’ll probably block sand the sealing coat, and perhaps we’ll reapply POR-15 if need be.
I don’t think we’ll need to redo any POR-15, though. It’s getting close.
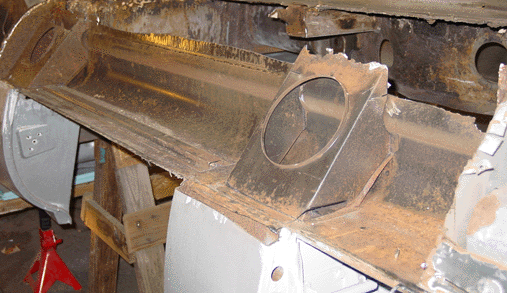
The next step on the bonnet is fitting the lower section to check that everything matches all right. After that (and after any adjustments that might be needed), we’ll POR-15 that section and the inside of the center section and the wings. We still have a bit of surface prep to do on the inside of the right wing. I’d then like to get the internal structure of the bonnet ready and fitted. These pieces are all in very good shape, though they do need to the stripped entirely, sealed and painted. Fitting will be done with new nuts and bolts, though I have cleaned up the so-called “oval washers” for refitting.
Left outer sill fabricated
I bought a new outer sill for the right side, and I decided to try fabricating the left sill from raw 20-gauge sheet metal. It was actually pretty easy, and I saved myself $150, give or take. The sill is really little more than a rectangular piece of steel, partially curved and bent at the points where 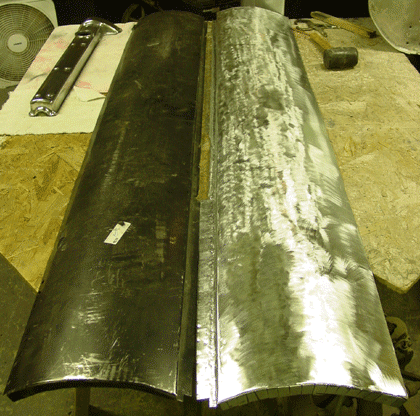 it meets the rest of the car body. Since the car is symmetrical, I just used the right sill as a pattern, reversing the bends and curves so that the piece would fit on the opposite side of the car. It took about four hours to get everything into shape. I still haven’t completed the piece, since I want to trial fit it before doing the final shaping along the ends and making the indentations and grooves on the lower part of the piece. I made sure to give myself some extra material, so that I had some leeway with the bends on the upper section of the piece. The sill I used as a pattern was about 12 inches wide, and I cut my piece 13 inches. It ended up that I will have to trim the lower section a little.
Before the sills can be attached, I want to apply POR-15 to the inside of the outer sills. We’ll also have to complete the attachment bracket for the left lower front frame (the one the was rusted out). This will entail fitting the frame, such as it is, and drilling the holes for the bolts. I’ll also have to spot weld the nuts on the inside of the bracket — two of those nuts are actually in the sill, so you don’t have access to them once the outer sill is attached. Actually, I’m in no rush for this to be done.
Right valve cover polished
I think I may have mentioned that I’m trying another POR-15 product. It’s called “Glisten PC” and it’s a tough two-part clear coating for polished metal surfaces. I notice that the aluminum valve covers and other aluminum parts of the car oxidize pretty rapidly. It would be nice to be able to protect that metal from the air so that it could keep its glow.
I had buffed and polished a valve cover and made ready for coating it with Glisten PC. As with POR-15, you need to prepare the metal so that the stuff sticks. I followed the instructions and used a special metal preparation called “AP-120” which evidently reacts quite quickly with polished metals. You leave it on “no longer than two minutes” (according to the instructions), and then wash it off. I put it on for about a minute. Trouble. The AP-120 discolored the polish. I went ahead and applied a small amount of Glisten PC to see if the polish would come back. No luck. I ended up removing the Glisten PC, rebuffing the entire surface, and applying some paste wax. I don’t know if that will help preserve the finish, but at least it doesn’t discolor the aluminum as soon as it goes on.
I think that POR-15 rust preventative paint is really very good stuff, and I recommend it highly. I’m not enthusiastic about Glisten PC, also by the POR-15 folks. It could be that it works very well for metals other than aluminum. I’ll give it a go on chrome and steel. We’ll see how it works on those metals.
You might have caught a glimpse of the polished valve cover in the sill picture above. I’ll close this entry in my restoration journal with a close up.

 I do wish we were done with metalwork on the “tub” — the car body. We haven’t touched the bonnet, we’ve done very little with the doors and the trunk lid, and the engine and other mechanicals are practically untouched.
 any) given to the body was no longer needed, so we cut it free and removed the vestiges of the left floor. This freed up the otherwise inaccessible space behind the interior rear bulkhead and the part of the bulkhead that faces the independent rear suspension (IRS) — a void of about 3-4 centimeters wide running laterally across the car. I vacuumed the dust and dirt that had accumulated, brushed off what I could, and Rustoleum primed the entire inside of the void. I really wonder why the car was designed to have this inaccessible area, since once the floor panels are on, you can’t rustproof or paint anything in the void.
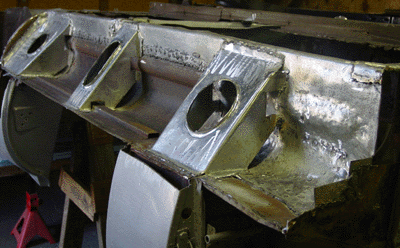 and used it to fashion the piece. The stiffeners were made from 20-gauge steel, and I fashioned the middle stiffener from the design I used for the middle stiffener done for the right sill. The secret is to be generous in your measurements for the tabs that you use to weld to the sill. It is easy to cut metal away, but not so easy to add it.
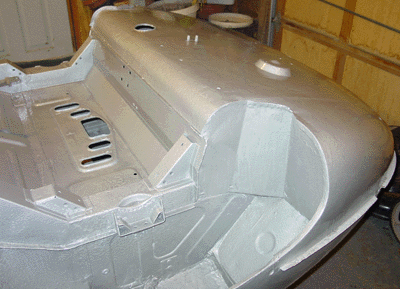
 weekend, when we cut the hole clean and ground off the tabs left from the old rusted out outer sill. The corrosion on this sill was mainly in the front, with some rust buildup at the rear of the sill, under the rear stiffener. As with the right sill, there was corrosion nearest the floor as well (in the picture that would the the top edge of the sill, since the car is upside down). I went ahead and took off the rusted section all along the sill, so that we can repair the sill as one piece rather than in smaller sections. It seemed to me that an integrated repair would be more durable. This repair will be very similar to the
 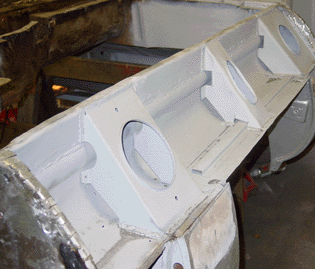 You might recall that
 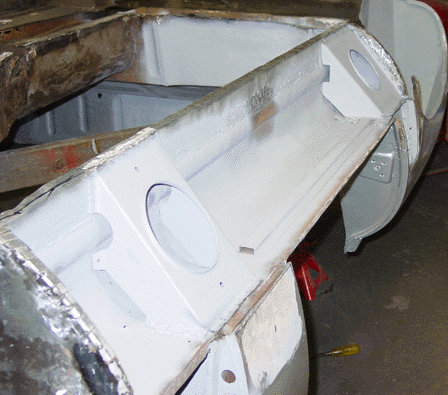 more than brackets that fit below the door frames — below the “B”-pillar in the rear and below the structure that holds the door hinges. They turn the (roughly) square sill into two triangles, and that’s why they are so good at stiffening the sills. I was thinking about putting a third sill stiffener in between the front and rear stiffeners, but after I got them in, it seemed as though there really wasn’t that much room between the stiffeners. At least not much to worry about. (I have seen a third stiffener installed by some restorers. They use a modified front stiffener.)
 After I installed the floors I was hoping to be able to install the “radius arm mount cups” — little fittings that hold the arms that come front from the independent rear suspension. But, the mounting cups need to be put into place before the floor goes on. Some of the holes intended for hardware are not accessible after the floor is fitted, since they are then entombed in the rear bulkhead. So I have to get at least one new mounting cup, possibly two. The mounting cup that we removed from the right side was damaged by the cutting tool, and it was at any rate pretty badly damaged by rust.