Right Sill Stiffeners
After the manufacture and installation of the sill end pieces on the right sill, I installed the front and rear sill stiffeners. These are little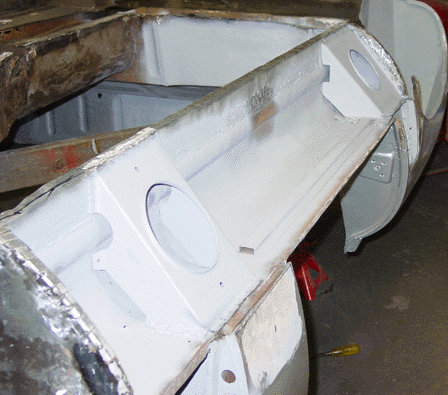 more than brackets that fit below the door frames — below the “B”-pillar in the rear and below the structure that holds the door hinges. They turn the (roughly) square sill into two triangles, and that’s why they are so good at stiffening the sills. I was thinking about putting a third sill stiffener in between the front and rear stiffeners, but after I got them in, it seemed as though there really wasn’t that much room between the stiffeners. At least not much to worry about. (I have seen a third stiffener installed by some restorers. They use a modified front stiffener.)
I had to fabricate the rear stiffener myself, and I used the existing rear stiffener on the left side of the car as a guide. That stiffener is intact, and it needs a little repair. I just created a template out of cardboard (the side of a Budweiser 24-pack), and tested it out by folding it and placing it into the sill. Once I was happy with the fit, I just cut the metal, leaving a little bit extra material so that I could trim it down after bending it. I installed both stiffeners with spot welds.
They really do firm up the sill.
Rear Bulkhead, Some Priming
The right rear bulkhead, you might recall, was pretty badly corroded about two inches up from the floor panel and nearest the sill side. I cut out all of the corrosion, cleaned up the internal structure that supports the rear bulkhead, welded in some tabs, and spot welded new metal cut the same shape as the area I had removed. After grinding it all flat as best I could, I put a thin layer of Bondo to smooth out the surface. After sanding, I primed the rebuilt rear bulkhead and the right inner sill. You might notice that I “missed” a small area about halfway along the sill. Actually, I didn’t prime that area, since I’ll need to weld the cross-member to the sill at about that point. I figured I didn’t want to cook my primer! I also primed the right rear wheel well, which I scraped and scraped and scraped to get off the various coatings of rustproofing and greasy girt.
Need Radius Arm Mounting Cups
I’m just about ready to install the right floor panel. I have a bit of sheet metal repair to do near the engine/transmission wall, but that is fairly trivial.  After I installed the floors I was hoping to be able to install the “radius arm mount cups” — little fittings that hold the arms that come front from the independent rear suspension. But, the mounting cups need to be put into place before the floor goes on. Some of the holes intended for hardware are not accessible after the floor is fitted, since they are then entombed in the rear bulkhead. So I have to get at least one new mounting cup, possibly two. The mounting cup that we removed from the right side was damaged by the cutting tool, and it was at any rate pretty badly damaged by rust.
The mounting cup on the left floor is in better shape, and I will know more about its usefulness after I get it off. I’ll probably grind the hardware off on Monday night and take a closer look. If it is serviceable, we’ll probably use it on the right side after we clean it up and rust-protect it. I want to get on with the floor panel installation, so that we can prime, rock-guard, and paint the underside of the car. Then we can get it back right-side up, and move on to some mechanical work!
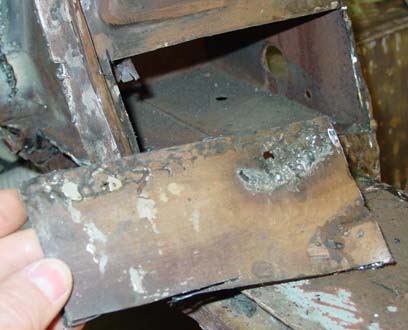 the outside of the “B”-pillar actually had some structural impact. Unfortunately, the way to obscure the fix was to apply bondo, and so the structural repair was apparent in a large lump of bondo about five centimeters from the base of the pillar, just under the door striker.
 Then we measured the hole carefully, cut it out, and welded it into place. The tabs themselves were spot welded, and then along the perimeter we used a regular old butt weld.