Painting color, finally!
It seems like it’s taken ages too long to get to this point, but the body is finally sporting Opalescent Dark Green instead of blotchy primer grey! It’s been nearly 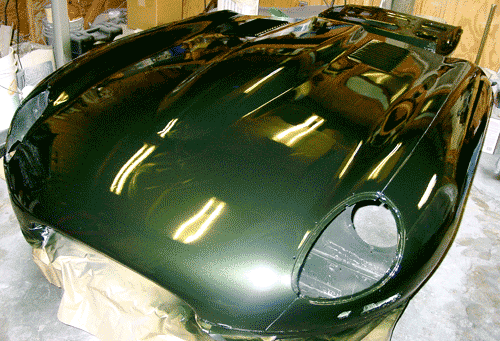 two years since the boys and I fetched the car from Virginia, and it is only now on the way to coming back together into car-like shape.
I don’t think it’s worth going over the tedium of sanding the bonnet (endlessly!), except to say that the process forced me to head to the paint shop for another quart of high-build primer. That last quart barely made it, too. To count the quarts of primer I’ve sprayed, you’d think that the car body would be little more than a large clump of primer, but that’s not the case. Most of the primer ended up suspended in water in a bucket after being wet-sanded off the body. I do think that my inexperience made the block sanding a little more difficult and protracted than would be the case in a real body shop.
If there is a science to block sanding, it has to be a matter of using the longest sanding board that you can manage on the space. I think the depressions that I ground into the primer — only to refill them with yet another spray — came about because I used either a short block or I used a too flexible styrofoam block at the wrong time. The persistent waves on the bonnet’s wings were conquered after I only used my long firm sanding board. (The picture above appears to show some wavy light lines to the right of the performance bulge. Those light lines are bowed because of the pressure of the bonnet sitting on the sawhorse underneath. When it’s not mounted on sawhorses the bonnet itself is straight, thank goodness!)
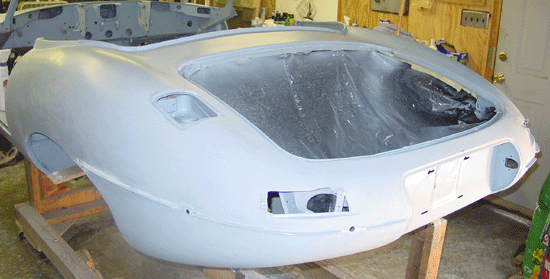
All surfaces of the car have been sprayed with color now, with the exception of the exterior sides of the doors and the trunk/boot lid and the gas filler cover. These final parts will probably be sporting Opalescent Dark Green after the Labor Day holiday in September.
Body shell color
The body shell took color well into August, and really the body shell didn’t take much time in August to prepare since most of the work had already been done. 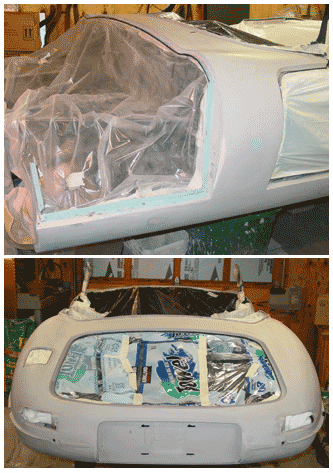 In July, I sprayed the final coat of high-build primer, and then I pretty much let it sit. The only preparation was sanding the wings lightly with a flexible styrofoam sanding board and them paying much more attention to the sills. I used the long sanding board on the sills, and this final prime/block-sanding took out the last of the ripples.
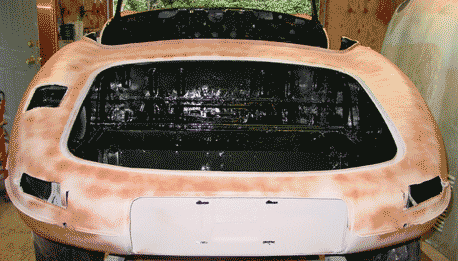
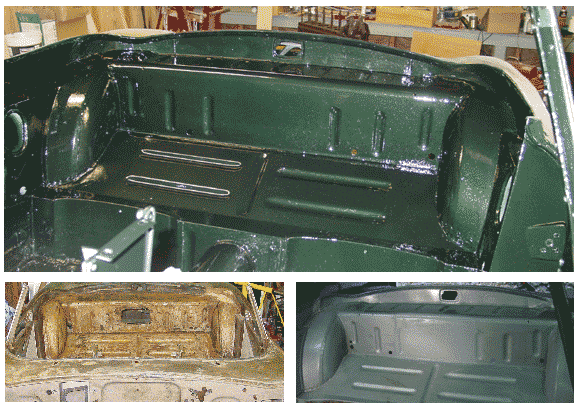
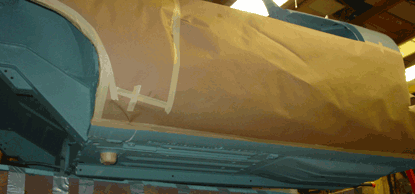
So, when it really came down to doing the job, the first part was masking. Since I had already sprayed color on the interior, inside the boot/trunk, inside the gas tank filler hole, and on the front bulkhead/firewall and subframes, those were all masked off. The borders of the already painted areas were scuffed with steel wool, and the masking tape exposed a small section of the already painted area. The narrow painted areas would get another coat of seal, basecoat, and clear. I figured it was worth coating these areas twice, just to make sure that color was uniform, and no lines of primer appear in the final product. These sections were all in “channels” so they are unobtrusive or obscured by rubber seals.
The process of masking took far longer than I anticipated. The easiest was the firewall/front bulkhead section since it was pretty much a straight shot. The trunk/boot area and the interior were more difficult because tape needed to be pressed from behind the plastic sheeting. I usually outlined the area with wide masking tape and then pressed plastic sheets onto the outline. The masking picture to the left shows the finished product. I used plastic grocery bags on the “A” posts, and Costco paper towel packaging served as the plastic covering for the trunk/boot area. The interior was draped in garbage bags that were cut along the heat-sealed edges to make large thin plastic sheets. I found that the thicker “drop cloth” plastic that you get at the lumber yard was simply too thick and not pliable enough to work with easily. (I ran out of 2-mil plastic sheet, and that worked very well, I should say.) The gas tank filler hole was just taped, no plastic needed.
On the masking tape: I don’t recall the wide selection of masking tapes a few years ago. Perhaps there were indeed time-rated masking tapes of various colors at paint shops, but I never ran into them. For this masking, I unsuccessfully tried a purple masking tape whose adhesive was supposed to be good for up to a month without drying out. The adhesives, apparently, can cause damage if you 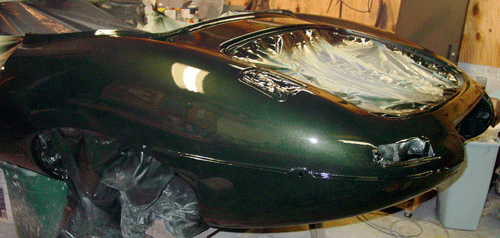 leave them on too long. I will admit that I have run into very old dried masking tape that’s been a bear to get off without damaging the underlying paint.
Well, kinder and gentler masking tape is a very fine idea, but the stuff has to stick in the first place. My experience with the purple masking tape was that it stuck at first, and then let loose with the slightest of pressure (like the blow of air from a paint gun) or it simply pooped out and let loose. My suggestion on the time-rated tape is to use the regular sticky beige masking tape, which I was told was good for “no more than four hours.” Unlike the purple stuff, the regular masking tape sticks. Although it’s worth taking it off as soon as you can, I’ve not had trouble with it damaging underlying paint even after several days. Leave it on for weeks, and you might have trouble. I noticed that Bill McKenna used the purple stuff when he was masking his E-type coupe for painting. I don’t know what he thinks about it, though.
The paint process, as before, entailed careful cleanup, spraying sealer, spraying basecost, and finally spraying clear.
I was a bit concerned about any wrinkling in areas where the paint might resist sticking, as I had run into before. Clearly, this is a surface preparation problem, and I think I ran into it because I did use a silicone-based sealer on some weld points. That should not be an issue on the body exterior anywhere, but I was careful to clean 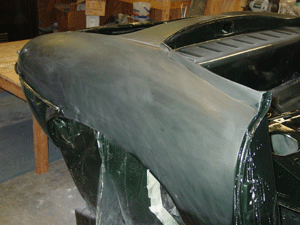 the primed surface with clean water, which I then dried with lint-free towels. This left the surface without any dusty primer residues from sanding. Next I used a “liquid deglosser/degreaser” that I have seen remove oils and grease quite effectively. I picked it up at Lowe’s so it is not anything special — just a typical brand. The degreaser is quite volatile, so it evaporates quickly. Then, after about an hour or so wait, on goes the sealer. The process is the same as before.
We departed from the previous paint sessions by blocking the completely dried clearcoat with 800-grit wet sandpaper. This wasn’t done immediately; I waited ten days to take it on. Because the surface was well shaped, there were no areas where I sanded through to the basecoat. I used a fairly small block of medium stiffness styrofoam (actually it was 3/4 inch foam insulation). For areas where I detected runs in the clear, I used either a section from a wood paint stirring stick wrapped in 800-grit or a small hard rubber sanding block to focus on the high areas. When I talked with the people at my paint shop, they were concerned that the clear was thick enough. If you do sand through to the basecoat, I was told, “you end up with a mess.” They advised that at least two coats of clear be on the surface before sanding. I didn’t count the coats on the car body, but I know that we resprayed the clear after the original coat had set a while. So, I wasn’t worried.
This post-clearcoat sanding was not a tenth as onerous as blocking primer, and a third as messy. The clear is much, much tougher than high-build primer, naturally, and so the mess is small. You end up with a thin lather of suspended clear over the surface, and the unfortunate orange peel or run ripples are easy enough to remove.
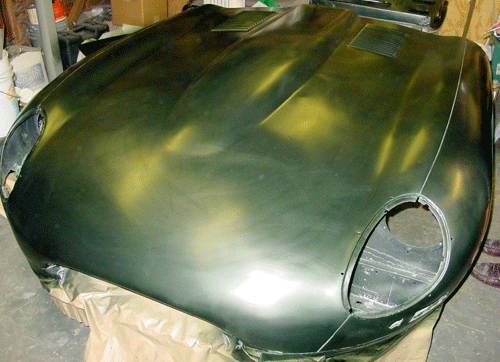
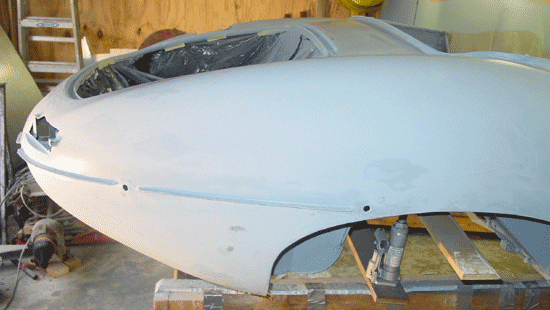
Bonnet color
As I’ve said before, the E-type bonnet makes up much more than even its formidable size in the imaginations of car enthusiasts. The bonnet itself comes close to expressing the most special qualities of the E-type. So, when it came to applying color, painting the bonnet meant really painting the car. And we wanted it to be perfect. But we did run into disconcerting 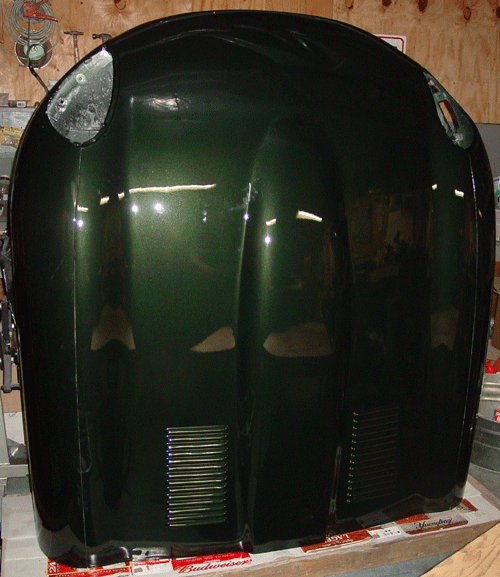 troubles before we finished the job.
The bonnet came in from the outside where the interior was sprayed with color after all the rock guard and primer had gone on. I believe that we can finally dismantle the old rolling rack that held the car shell for over a year. (We made the rack from wood salvaged from a humble old chicken coop. So, I guess one could say that instead of finding this car in a chicken coop, this one was on top of one for more than a year.) We put the bonnet on saw horses that fit to each side of the performance bulge and nearly touching the inner duct wings. This was a mistake. Or, at least the way we set the bonnet on the horses was a mistake. We didn’t pad the points where the bonnet and the sawhorses met, and we discovered that the weight of the bonnet pushed the metal out at the forward-most points of contact. On the left side, this was a gentle bulge that disappeared when we lifted the bonnet from the sawhorses, but on the right we have a little touch-up to do. I think we’ll be able to press out or gently knock out a persistent bulge on the left side. Aaron noticed the bulges when we were rubbing the bonnet with steel wool (for reasons spelled out later). 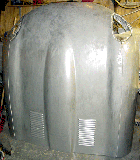 They were unfortunately not visible at the time we set the bonnet on the sawhorses.
The Moral: If you use sawhorses to suspend your bonnet, make sure that you have the sawhorses well padded, and I think fashioning a broad supporting plate from plywood is advisable. You need to spread the weight resting on the sawhorses.
I mentioned steel wool. Here’s the story — another mistake that a little research solved, but that could have been messier to deal with had we continued with the painting process. After the sealer and the basecoat was applied, we noticed that the basecoat was drying “cloudy,” as if it had been lightly covered with a whitish-grey spray. This was only apparent after the basecoat had dried, and the cloudiness was not uniform across the surface of the bonnet. In general, it followed wide lines of the spraying itself, usually appearing where there was probably an overlap of spray.
I had not run into this on other surfaces, and I initially thought that the cloudiness might be resolved when the clearcoat was applied, since the clear is supposed to melt and resuspend the base. But I wasn’t sure, so I searched the web and found that this is a common phenomenon that is usually caused by thinning the basecoat too much or by applying clearcoat before the basecoat has dried sufficiently. The “cloudiness” is actually suspended flakes that float to the surface of the too-thin paint. The recommendation was to reshoot base on the surface, making sure that the basecoat paint was accurately thinned. Not too much, not too little — just right.
I took a little fine steel wool after a cloudy section, and the clouds disappeared with a little rubbing. The integrity of the basecoat (which dries very soft) was unassailed. Aaron and I rubbed the entire surface of the bonnet with steel wool to dispel the clouds, so to speak. After that, Aaron cleaned the surface with compressed air, and I sprayed another thin coat of basecoat over the bonnet. It dried as expected, and then the clear went on. We let the clear set for about a half hour, and then sprayed a second coat over the almost-dried first coat. It was a bad oversight on my part to have missed taking a picture of the clouded basecoat. If it happens again, and I hope it won’t, I’ll remember to take a picture. You can imagine that things were a little tense around the old DeLong hacienda as the bonnet clouded up!
The bonnet will get the 800-grit sanding treatment in mid-September, about two years after we initially rolled the car into the old cat cage garage.
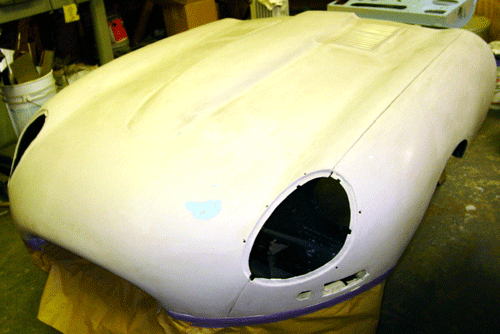
The photos below show the bonnet in primer, basecoat (after steel wool treatment) and after the clearcoat. You can see one of the door panels to the rear of the bonnet. The interior sections of the doors and the trunk/boot lid were painted with the bonnet.
 It was, I suppose, rather uneventful, except for the fact that it meant that the car was closer than ever to supporting itself on four wheels. For that matter it was closer to the ground than it had been for over a year — on
 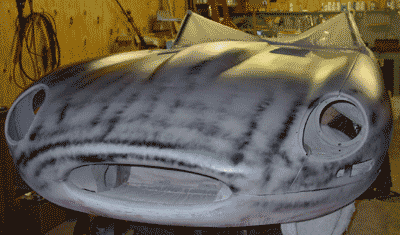 that would get some attention from the sanding block.
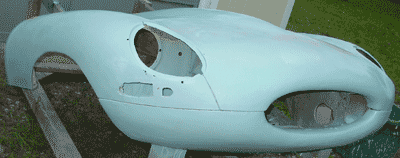
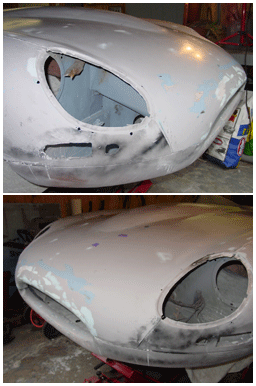 nose pictures you can see several shades: spots of exposed metal are dark, a pinkish color is body filler used after hammering out the metal, light blue (almost white) is “Easy Sand,” sky blue is “Tie-Coat” primer and the grey is the two-part high-build primer. I put three small pieces of purple masking tape on an area of concern: a gentle dip on the left side of the “performance bulge.” This place will get a little extra high-build when I next spray it. This is a barely perceptible dip that I think can be eliminated without too much of a buildup of primer, especially since the area surrounding it has been brought down with block sanding.
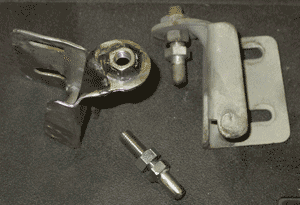 bad impact to the right front side of the car at some point. My guess is that the peg was either ripped off at that time or the bracket and the peg were severely bent and they eventually weakened and fell off, or were simply torn off to get them out of the way. Blame a previous owner. I could have located a replacement, but I decided to repair the original with a washer and some deft welding and grinding. I also fashioned a new peg that is very close to the peg on the intact left side latch bracket. I am now thinking that I will plate the pegs with zinc and paint the brackets with a metal/aluminum paint. The pegs will need to have a durable, abrasion-resistant coating.
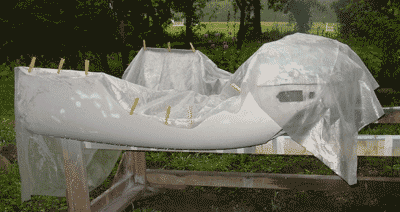 But I could not do the blocking over the channels as I had hoped. The structure itself was too fluid and loose, and so it was apparent that I had to fit the bonnet internals more permanently in order to work with the outer lines of the bonnet.
 that it was better to fashion new flanges than to try to fill the gap, so to speak, with adhesive. Apparently using an excess of adhesive is common practice, but I think it would look tacky and probably not be as stable as customized — and (I know) non-standard — flanges. So we put the last bits of the 20-gauge steel to use. (Historical note: Aaron and I fashioned the new flanges, but we also used one welded up by John Boutin when he and his family visited us back during Thanksgiving vacation 2003. He wanted to try his hand at welding and that was his project. The flange now sits in the forward right position, holding the right side duct nearest the bonnet mouth.)
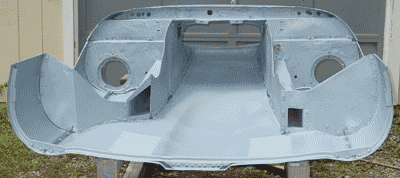 Mike Moore, a two-time Jag E-type restorer in California, gave me particulars about getting the Sikaflex adhesive that is “original” for the E-type bonnet. Mike says it is very good stuff. Nonetheless, I decided to go with a polyurethane adhesive, since I had read in a post from Dan Mooney (of Classic Jaguar) that a good polyurethane adhesive would do the trick. Besides, I could obtain that nearby.
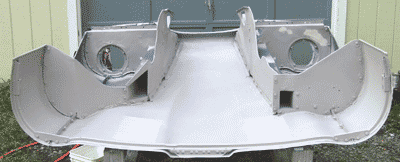 we have really needed the rain). That is to say: moving forth with the bonnet while it’s perched (and covered) outside has been a little hit-or-miss. I’ve been reluctant to paint when rain threatens, of course. Priming has been a bet with the weather, but by the end of the month the bonnet internals got a coating
 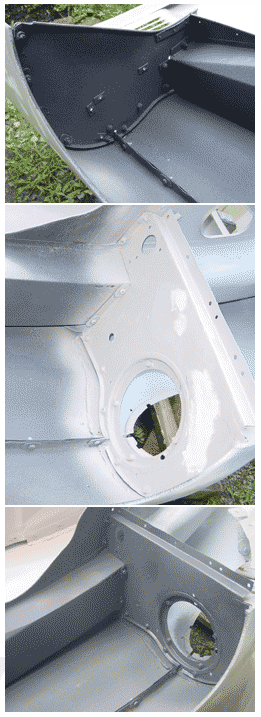 of “Tie-Coat” primer and the two-part high-build primer. Also, the front wheel wells were coated with rock guard. Inadvertently, the rock guard ended up a two stage process, in part because our Internet connection went out after a power outage and I couldn’t consult the well illustrated “FAQ” on applying “underseal” that is posted on
  bad about it. I manufactured a completely bogus 1963 North Carolina license plate with some old Plexiglass, a handful of modelling clay, some plaster of Paris, Bondo (the cheap kind), and some paints found in the garage. The process was simple: Using the plexiglas as a base, I fashioned the raised letters and numbers with the modelling clay, making the side bevels a bit more gradual than the eventual product. This allowed for some material for shaping. After applying a bit of dishwasher soap and water to the Plexiglas and clay plate, I poured plaster of Paris over the plate. This made a mold. After the mold had set, I applied Bondo to the mold, and embedded a piece of wire screen for strength — an entirely good “blodger” practice. I had to break the plaster apart to remove it from the Bondo, in spite of the soapy lubricant. Final shaping was with sandpaper.
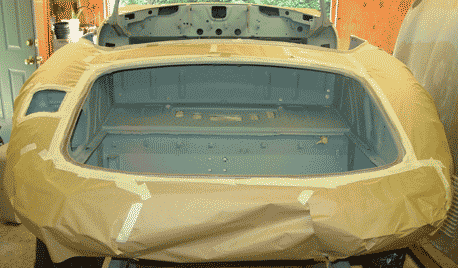
 I thought about calling this section “Sproing!” because of the trouble I have had with the upper wishbone “circlips” (also known as “snap fasteners” or “internal retainers”). I got new upper and lower ball joints/ball pins for the wishbones, and the upper kits were supposed to have included internal retainers. And one kit did, but the other replaced the internal retainer with an external retainer, which of course wouldn’t work at all. I fetched the old part that I removed that had the internal retainer and I figured I was set.
 through Florida to see relatives and participate in a travel exchange with people in Sarasota. I was a little worried about suggesting that we take on a project with the old car, since I didn’t want to impose my restoration work on an unwilling participant, but it actually turned out that Dad wanted to do exactly that.
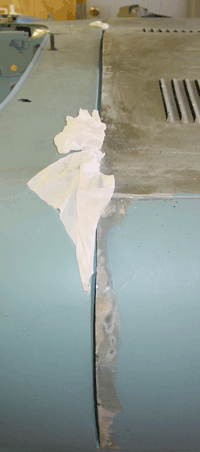 bonnet fit against the lower sections of the bulkhead and the upper sections. Things were slightly wider at the upper part than at the lower, meaning that we could raise the bonnet to even things out.
 roots. The initial spray appears later in this page.
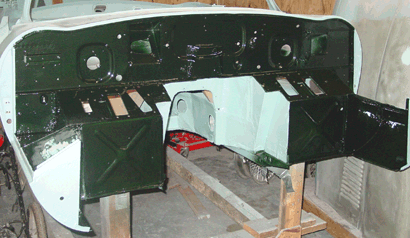 out that 77RW was Opalescent Dark Green, too. I mentioned that I didn’t like the color of a Opalescent Dark Green car I’d seen on the Classic Jaguar website, but I noticed as well that photography of the color varied enormously. You can’t get a picture of what the color “really” is, since that is part of the charm of an opalescent/metallic paint. The dark green seems to play with light especially well, and it appears nearly black in some light and glimmeringly dark green in other light.
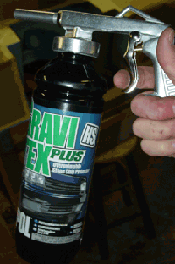 in abundance this winter, you just want to hunker down and get through it. So I occupied my restoration time with things that were easy to do in short and less cold moments. Little things over a long period do add up. This is a two-part addition to the restoration journal. Welcome to part one….
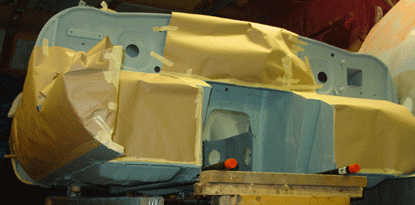
 I left the undercoating for a week or so before spraying a thin coat of primer over the surface. This may have been unnecessary, but auto paint folks suggested it for good sealing and for a uniform color beneath the paint.
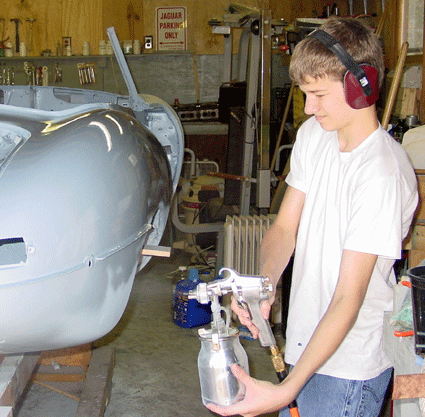 warm temperatures to open up the garage and spray the body shell with primer. The temperatures reached the mid-70s (Fahrenheit, 20+ Celsius), and so short sleeves did it, as you can see from the picture of Aaron spraying the right rear quarter panel. As everything was open and the fan was blowing, we didn’t use face masks, which probably weren’t necessary in this case. But we did wear ear protection because the compressor is so loud. In retrospect, I believe we should have worn our respirators, too.
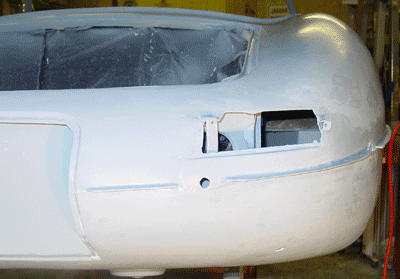

 garage has been nice and warm, and I have been able to do some more priming in shirt sleeves. As a result, the entire exterior and the body shell underside is primed. (Actually, there are small portions of the underside that need some primer — the front portion of the footwells that sit on the crude frame I made to hold the body.)
 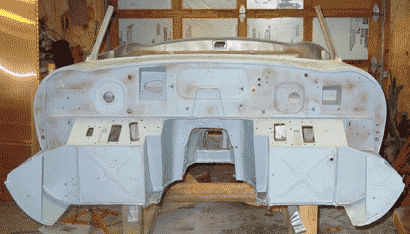 Anyway, the jacking opened up most of the space along the beams and all of the trunk floor for priming. As I mentioned, only the front footwells still need priming. So, after I’m done with the trunk floor, I’ll get those primed. I figure that I’ll get the “Rock Schutz” rocker guard on the edge of the trunk before I lower it, though.
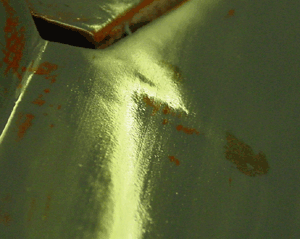 Detecting the dent — Why light is your friend
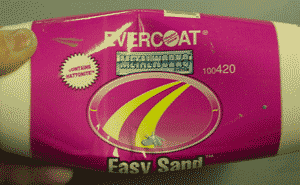 The filler I’ve used for this final work is “Easy Sand” by Evercoat. Bill McKenna mentions it on his ’63 E-type FHC restoration website, and I found it at the local auto parts and body shop supply. The chain automotive stores, around here at least, don’t have it in stock. It is very good stuff. The filler comes in a tube-like bottle (see the picture), so dispensing it is easy and creates no mess at all. Like other fillers, Easy Sand is a two-part product, so it should be durable. The filler itself is very fine and goes on very smoothly — it’s more a cream than a putty. The manufacturers say it bonds well to metal, plastic, and primers.
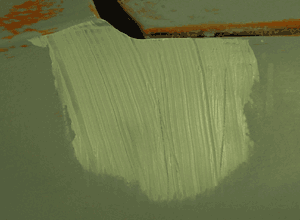 I’ve always doubted whether the stuff would stick to primer, so I’ve ended up sanding right to the metal again. Also other fillers often sand badly when they are adjacent to buildable primer. The stuff usually is slightly harder than the primer, and so you have to be careful about outlining your filled area with a low spot in the primer. (Good blocking usually makes this less likely, though.) The Easy Sand product blocks very nicely.
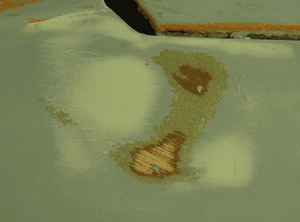 Block the area after the filler has cured. The area should be noticably better, though it might have a few imperfections. I noticed on this repair that I missed a small tap dent that I created while tapping down one of the high spots. It was not a particularly big dent, so I figured that the buildable primer would take care of it You can see the effect of the 60-grit sandpaper on the area. The two original high spots have merged to become one elongated spot, now flat from sanding. Flanking low spots have been filled with the filler. There isn’t very much filler left in the area, which is as it should be.
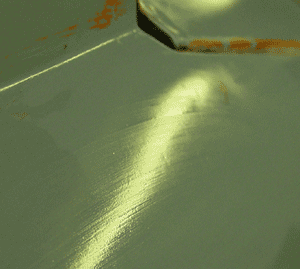 After the filler is blocked, it’s time to reprime the area. I use a paint brush to apply the primer, and that works quite well in small areas like this. After the primer is dry, block it again. This should bring the area to where you need it to be. I did this small repair after the second primer coat was blocked, and the problem was apparent. (This door has been a real job, and this little fix was nothing compared to the rest of the smoothing that was required. The big work was the result of many minor ripples all over the mid section of the door. That work was tedious mainly because getting the lines straight was complicated by the large surface area.) Any imperfections in the primed surface of the repair will get a at least one more going over before the surface is ready for color. I check the light line of the repaired area to see where it needs more attention. As you can see in the bottom picture, it’s in pretty decent shape, though it has some slight indentation yet. This will be taken care of in the next round of primer coat and blocking.
 much new to report, though I will post some photographs after the Christmas Holiday week. I’m taking most of the week off, and perhaps warmer temperatures will be a nice Christmas gift to us this year. One thing that is needing some handling is a high spot on the right door. I’ll document the handling of that little detail, since there is a little difference in body correction at this stage in the game, that is, during the final points of priming and preparation for “spraying color.”