Right Engine-Tranny Cover
A previous owner of the car must have been a happy owner of a pneumatic cutting tool, because he made some interesting cuts to gain access to the transmission or the 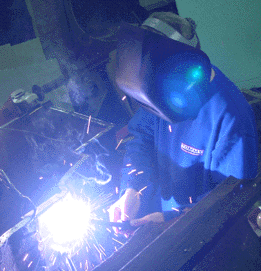 transmission bell housing. It’s not particularly clear what exactly required such invasive and destructive work to be done. I was thinking that perhaps there was simple laziness at the root of it. For typical adjustments, the E-type has adequate portholes going into the transmission area. But perhaps this was starter work? A clutch job (unlikely, I think)? We shall probably never know.
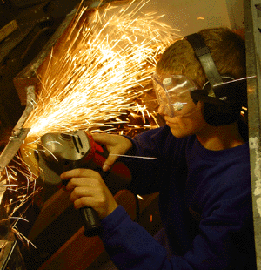 Anyway, I fashioned a replacement piece for the front engine/transmission housing wall out of 18-gauge steel, and I cut out the damaged piece from the transmission cowel. That piece we replaced with another piece of 18-gauge steel. Aaron did the welding and the grinding.
It is amazing what was considered acceptable repair for previous owners of the car. The pieces we took out were welded, of course, but the welds consisted of blobs of metal with vast voids between them. There were no additional pieces of metal welded into a lap over the holes that were cut (roughly, as is always the case with pneumatic impact cutters). Even the roughly cut slices apparently weren’t even hammered the slightest bit to make them straight. It was, apparently, simply jack-hammer cut and splotch-welded.
I find I have little patience for this shoddy workmanship.
This was not a difficult repair to do. It was really a matter of cutting metal and welding it into place. Aaron did a very good job at putting it all straight, and now the piece is markedly more sound and complete. A good success for a first welding job on the Jag.
Some Painting — Black Stuff
In short, one of the IRS supports, the engine mounts, the IRS access plate, the water pump pulley, the passenger-side (right) air vent, and (primed only) the mounting bracket for the voltage regulator. The voltage regulator bracket is supposed to be silver color.
Radius Arm Cup
The couplings between the floor panels and the two radius arms extending from the rear suspension need to be installed before the floor panels are installed. We looked at 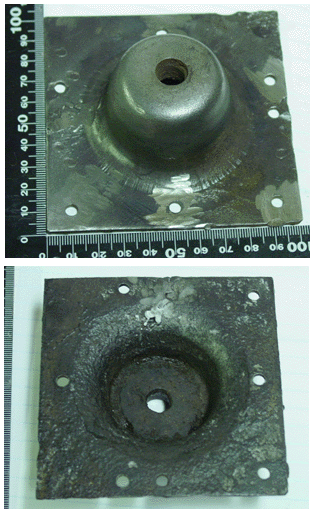 the existing cups and one of them was corroded beyond repair. I ordered a replacement for it. The other one still lingers in my mind as a repairable piece or as a replacement piece. We did go ahead and repair the cup that still has structural integrity, though questions remain because of the threading in the center of the coupling. They are not exactly well defined. I could, perhaps, go ahead and retap the threads with some success. At this point, we are going to wait until the new part arrives (sometimes after the Thanksgiving Holiday, I was told) and then we’ll make a decision about the replacement. I definitely do not want to install a restored part that will fail after a few thousand miles!
The replacement “radius arm mounting cup” costs US$55.00 plus shipping. I took the restored piece into the hardware store to see what I could find for mounting the piece onto the floor panel and to see what the threads inside could actually do. It appears that the rust damage didn’t corrode into the piece, but rather filled into the threads. I think as metal rusts, it expands, so this might be only partially reassuring. I could, of course, tap the piece into a larger thread size, but then I would need to use a larger attachment bolt — a risky proposition, since the bolt also goes through a bushing assembly. I could also add metal to the threaded area, and then drill and tap it, but I’m not clear that the strength would be as good as it should be.
Rear Floor Stiffener
This is a part I had to fabricate, since it was not available from my US supplier, and there were no plans to import any more (from what I could tell from the supplier, anyway).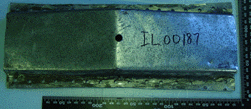
It is a simple part to fabricate, though I’ve found that any fabrication is putzy. I created a template from the original part, transferred the pattern to 18-gauge sheet metal, cut it out, bent it, welded it, and drilled it. This part probably took four hours to create, all told. I did do a bit of extra work on this piece, just to make sure that it served the purpose of “stiffening” well. I reinforced the attachment tabs with a double thickness of metal (two times the 18-gauge metal, that is). It’s currently ready for priming and installation, once the floor panels are in place.
The number written on the piece, by the way, is for the part tracking system I developed.
Repair of Trunk Floor
We fixed the bondoed hole that was located next to the hole where the fuel filter cup extends below the body. This was damage that didn’t become apparent until we had removed 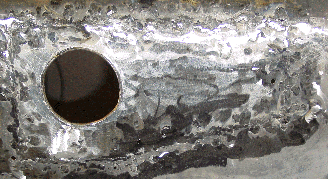 the paint from the inside of the trunk. The fix entailed cutting out the corrosion and the entire fuel filter cup hole, even though the rust damage was isolated to one side of the hole. I figured it would be easier to create an entire hole than it would be to try to fashion a piece and attach it flawlessly to the “good” metal of the original hole. Once again, this was a matter of exactly fashioning a replacement piece, welding tabs to the hole, and welding the new piece onto the tabs.
The picture is, perhaps, not so very informative, but it does have a certain artistic quality, I thought. It is almost an impressionistic rendering of the repair. Monet in the Cat Cage garage! This is the metal after most of the grinding was completed and before I put a layer of Bondo on. At least my Bondo application is over real solid metal, not fiberglass mesh.