Interior insulation and sound dampener
From the outset of the restoration, I’ve been planning on insulating the interior and inside the trunk, especially below the spare tire storage and fuel tank area. I’ve kept an eye on products that would do the job well. I found two good candidates — Dynamat which is available through 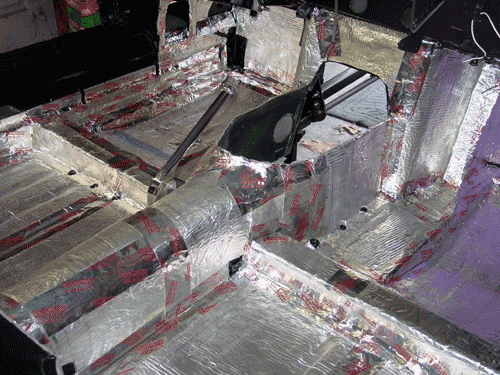 Classic Jaguar in Austin, Texas, and Fatmat which looks to be a less expensive Dynamat knock-off. The products are very similar: basically a laminate product with a flexible rubber-like substance laid over an aluminum or perhaps mylar substrate. Thicknesses vary, and the products include their own adhesive backing.
I felt that the Dynamat and Fatmat products were overpriced, since the technology doesn’t look that revolutionary. However, the Dynamat products look like they are textured to optimize sound deadening, as perhaps are the Fatmat counterparts. They do have the advantage of being sized and packaged for automotive use. Since I’m not planning on putting a huge subwoofer in my car (as a matter of fact it won’t even have a radio!), I won’t need optimal sound deadening. I’ve looked around for similar products, and I ended up with a good match in an HVAC duct wrap. It’s made the same as Dynamat/Fatmat and ends up being about a quarter 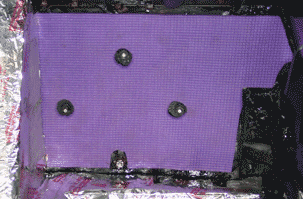 of the price. Physical properties are similar, though the sound deadening properties of the duct wrap has to do with absorbing vibration on the foam side. The aluminum sheet is not perforated or otherwise adapted for sound deadening.
I used two differenty types of mat, actually. The predominant type was the aluminum covered foam, but I did use a purple foam mat as well in the front of the footwell. It is actually a foam pad used for softening the floor for exercise, but it is tough and will absorb vibration and sound well. Since it is durable, I’m thinking about using it as a backing for the “hardura” covers of the door sills and the floor of the trunk. The only concern I have (and it is not inconsiderable) is that the purple mat also has a “nubbly” texture that could (most certainly would?) show through the surface of vinyl. That said, this purple stuff is more durable than the aluminum foam. It would perform well in areas where there would be little other padding (felt or otherwise) and where constant crushing might be expected.
On the installation: I wanted to make sure that the foam would stay in place. Even though the aluminum foam was designed with an adhesive backing, I decided to cover the panels with contact 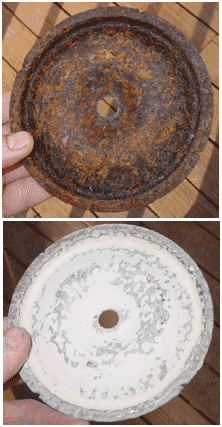 cement so that the foam would stick with more vigor. The purple foam, of course, required full contact cement treatment, since it had no adhesive backing at all. I also used aluminum tape to cover all the joints, and those joints were prepped with contact cement as well. Things stuck very well, and there shouldn’t be any loose edges anywhere for a long time. When I fitted the mat, I cut away to leave bolts or holes exposed so that I can get to them later more easily. I also cut away foam from nuts that would otherwise have become lumps in the surface. The mat will even those out a bit.
Redoing air filter canister assembly
The air filter assembly consists of a large cannister and a triangular-shaped top that directs clean air from the cannister to the intake manifolds. A replacable air filter sits inside the cannister. The canister was especially rotted with rust in the base, and the round retaining plate that holds the filter in place was also badly rusted. I really don’t know why this would have been so badly rusted, since I would have thought that it was fairly protected from moisture. The inside of the canister may not have been painted — at least that’s what I’d suspect from the condition of the parts.
The canister was especially bad at the base, where there is a “false floor” with four round holes showing the real floor of the cannister about an inch under the false floor. I suspect this doubling was an attempt to baffle the air flow and even out the circulation of incoming air. The space between the floors would also serve to capture grits and larger objects 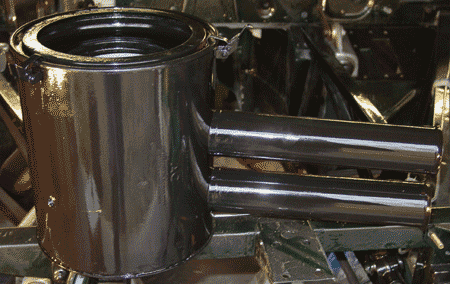 so that they wouldn’t blow around near the filter.
I did the POR-15 treatment on these badly rusted items, and I rebuilt a small section around one of the canister floor holes that was enlarged by depleted metal. In order to get the coating to cover inside the section between the doubled floors, I poured some POR-15 into the cavity and shook it around until I was convinced that the inside surfaces were covered. I used basically the same prep as I did with the fuel tank, except that I had a much more accessible area to treat. The round retaining plate was treated in the same manner, and there I had to repair a hole or two with mesh and POR-15. It wasn’t pretty even after the treatment, since the surface was so badly pitted, so I used a bit of filler to smooth the surface a bit. This was cosmetic and probably a waste of time, since the piece is completely obscured and only sees the light of day when you change the air filter. I painted both that round piece and the inside of the canister a 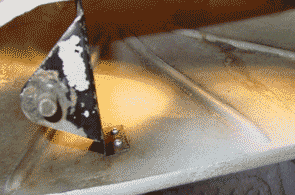 metallic, so it looks a little too silvery to be real metal, but at least it’s got another protective coat of paint on it.
The cannister is supposed to be black, at least for the 1963 model year. There has been some disagreement about this, since some cannisters apparently are hammered silver/grey in their current incarnation. The pictures I consider to be authoritative all show a black cannister with a hammered silver/grey triangular air filter manifold. So, I sprayed the outside of the canister and its clamp-on top gloss black.
They look pretty good — better, in fact, than I was thinking would be possible when I first looked at the rusted cannister bottom.
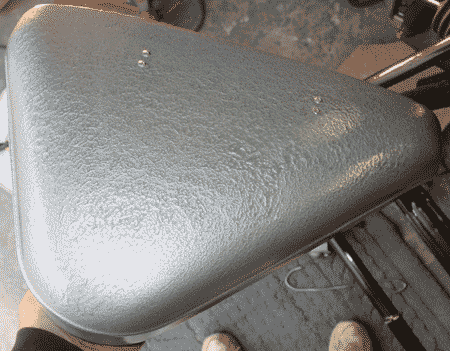 The air filter “plenum” is a triangular shape. Early 3.8 E-types also had a smooth top of the plenum, but they also had flanges that extended outward at the seam of the two shells making up the part. My plenum is smooth, too, though it doesn’t have flanges. Also the inside of the top shell has three grooves that roughly correspond to the grooves that later appeared on the tops of plenums beginning sometime late in the 1964 model.
I didn’t use a stripper on this piece, because paint strippers will also attack the fibreglass resin. To prep the surface, I sanded the old finish and removed any paint that was flaking or loosened with age. The metal pieces for mounting the manifold to the intake are attached with pop rivets, four on top and four on bottom. I removed the top rivets before repainting, but I left the bottom ones on. They are for all practical purposes invisible, and I wanted to lessen the risk of damaging the painted surface when I riveted. The top pop rivets were replaced with new.
Parts for repair and replating
Once you get paint on a car, having to wait for the trim becomes increasingly unbearable. I lessened the strain by quickly putting on the chrome surround that marks the edge of the license plate recess on the back of the car. And, of course, I dragged out whatever chrome I could find to see if there was some piece that was acceptable at least to hold 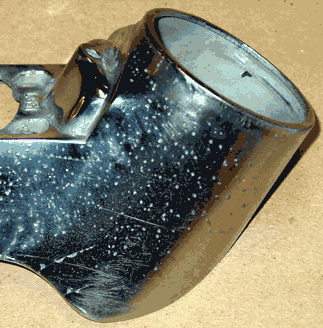 against the body just to see chrome gleam against body color. Alas, my chrome isn’t in very good shape, and so I have to ship it off to have it repaired and rechromed.
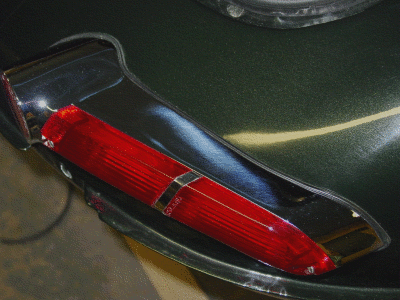
I suppose that the taillights are the worst of the chrome pieces. They had suffered the elements most directly. The exterior door handles were probably the next worst. So, those were the parts that were packed up and sent away to a small chrome business in California. The fellow has some experience with 1963 Jaguar parts, and a fellow Jag restorer in the area said he would inspect the repaired parts before they would be sent off to the chroming shop. I’ll provide more information (and, I hope, a nice plug for the refinishing shop) when I get the parts back. I gave up finding a plater in North Carolina. While there are commercial platers around, they want sizeable and regular orders. The single “one-off” plater I found in Fayetteville, North Carolina, turned out not to be very responsible and so I rescued my suspension parts and did them myself. I don’t want to mess with chroming, however. It’s more of a challenge than I want to take on, especially when it comes to replating pot metal.
If things go well with the taillights and door handles, I’ll be sending the same California shop my bumpers for the treatment. They’re not as pitted as the pot metal, of course, but they need some attention.
The front sidelights turn out to be in acceptable shape. Whatever imperfections are on the chrome are small and they are tightly nestled against the bonnet in any case. I will need to work those a bit to get them to fit on the bonnet correctly, though. I’m not going to do any grindiing until the bonnet is sitting pretty on the body, since the shape of the bonnet seems to be fairly fluid until it’s actually in place. The interior chrome, for the most part, is also in good shape. The inside door handles are right at the tipping point for new chrome, and the chrome post that holds the rear view mirror is a wreck. I think it’s due a replacement, not a repair. The various escutcheons and ornaments on the dash and in the interior look good. With a cloth buffing, they’ll be nice.
IRS is next
While I had the entire male crew around, we lifted the IRS onto a work table. It’s going to get the attentions of mid-winter garage work.
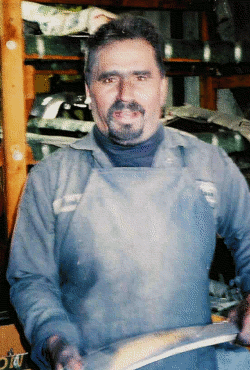 Best Chrome in San Martin, California. I sent them off in December 2004, and I let Ricardo know that I wasn’t in any hurry. The chrome pieces came back in February, after Ricardo attempted repair of the originals without success. He acquired different taillights and chromed them up, abandoning the ones I sent to him as lost to the scrap heap. (May they rest in peace until they are remelted and made into something useful!)
 cleaned the accumulated gunk.


