Data plate, final episode
I might as well get this done right now. I finished the truer-to-the-original data plate with the able help of Eric MaLossi, and I’m quite pleased with the results. The plate is a little thicker than the original, so it resists a bit more 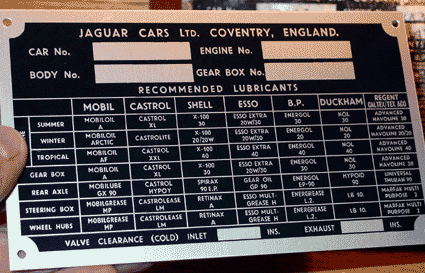 under the mallet and die, but it should be easier to handle at installation. I have placed mine aside until I can be sure that the numbers that I’ll have on the car are what I expect. I know the body number will remain the same, but I haven’t had the engine block or the gearbox thoroughly evaluated. I’m not expecting any problems with either, but things have been known to happen unexpectedly in restorations.
The data plate could be improved with the adoption of a more original technique. The originals were probably done with etching and subsequent anodize. My plate uses a technology that might not have been in existence in the early 1960s. It’s called “photoetching.” It is quite durable and scratch resistant, but the black print is flush with the aluminum surface — no ridge at all at the edges of the letters and borders. Since the plate’s contents are true to the original, it is nonetheless superior to many, if not all, of the data plates currently available.
I believe I’ll never look at a plate in quite the same way again. Last night I was going through a book that displayed a plate of a “very fine” restoration, and I picked it out easily as an aftermarket “almost” reproduction.
Left door back together
Putting the doors back together is just slightly easier than taking them apart, probably because you can remember some of the pain of the initial door disassembly. The process is basically the reverse of the disassembly, and the trick is getting 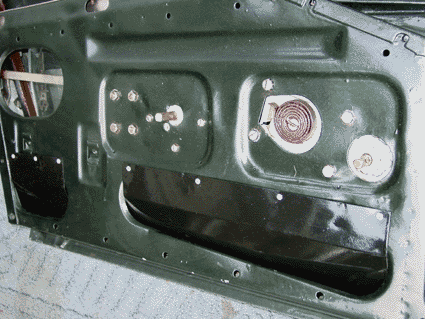 the bolts for the door latching mechanism and the window crank in the correct places. You need to think about the ways that the bits weave around one another. First the door latching mechanism, then the window assemblies.
I cleaned off the mechanisms with a steel brush and wire wheel, and they came quite clean. The door shell needed to be fitted with the drainage hose (don’t miss the clam that holds it in place) before any of the mechanicals could go in. The last items to be placed were the black skirts that close off the lower access holes. These seem often to be removed and never replaced, as far as I can tell. Pictures I’ve seen of reconstructed doors lack these little steel features, perhaps because they serve no practical purpose except for noise control, maybe. They’re pop-riveted on, and I used strips of neoprene padding to control vibration. Along the edge where the rivets are placed, the pieces were originally caked with a rubbery sealant-adhesive that may have served the purpose of dampening vibration.
Getting the left door set up took an entire afternoon. I’ve put off doing the right door because it is a bit tedious to do the job.
In order to fit the door, the weatherstripping and seals needed to go in. I got a very complete rubber kit from 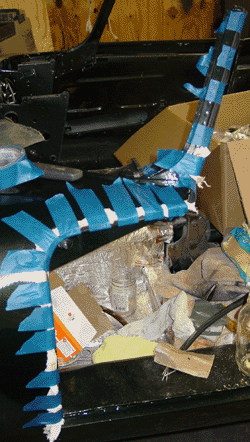 Classic Jaguar, and it has so far been extraoridinarily complete. I used 3M Weatherstripping and Gasket Adhesive. It’s basically a contact cement, and the tube I got was unfortunately full of a yellow-brown cement. The stuff shows up very brightly on Opalescent Dark Green, I can tell you! I did not follow Dan Mooney’s advice to fit seals with masking tape before cementing them in place, so I couldn’t adjust fit. I just cemented the pieces on, using a healthy amount of blue masking tape and some paper towel to hold the seals in place.
I did have to trim pieces of the seals, of course, but that was easily done without doing the taping to fit. Other sections of the car might need more careful treatment.
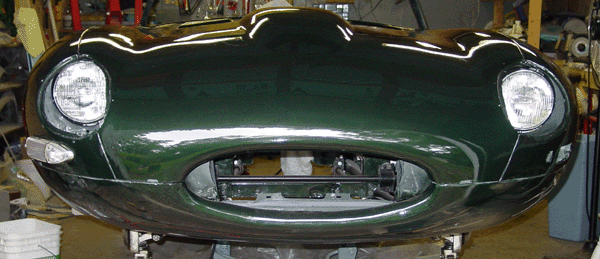
Fiat lux! Let there be light!
The bonnet having been prepped and clearcoated for a second time, we set about making the bonnet harness and installing the lights and horns. Of course this entailed redoing the bonnet harness that extends from the male bonnet plug receiver to the lights and horns. I used the same approach here as I did with the rear harness. That is, I used the original wiring on the bonnet plug receiver to connect to a new spade-connector connection block, and from there the hand-made harness reaches to the end points. The bonnet harness deviates a bit from the original in that I did not use exactly conforming color coding, though the wire gauge meets or exceeds the originals. The wiring colors were similar (a reddish/pinkish replaced the original red, for example). I was also uncomfortable with the grounding scheme.
The schematic diagram shows that wires go from the light housings and such to ground, probably on the bonnet somewhere. It’s a mystery to me exactly where the wires originally grounded on the bonnet, though my documentation shows that some grounds ended up on the mounts for the horns. Instead of grounding to the bonnet, I decided to run ground wires to a grounding point near the bonnet plug that can be connected by another ground wire to the car body itself. It seems to me that the bonnet connections to the car body are simply too insulated with new paint and lack unambiguous metal-to-metal contact.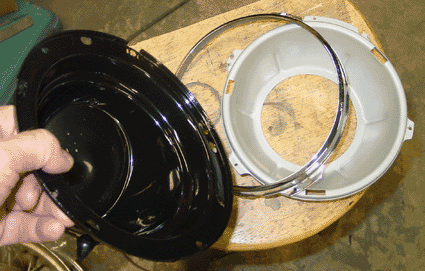 Of course, the original grounds worked, but I want the grounds to be unambiguous, just like the other wiring.
I ran individual ground wires to the electrical parts, since simultaneous loads at night with the horns blaring might make up a fair bit of current, and I’d hate to heat up a too thin wire. The horns use a pretty fair amount of current, and so they need to find their way to ground in a safe manner, too.
The headlight housings were caked in tar-like rustproofing, and they needed a thorough scraping, scrubbing, and sanding before being painted. The internal areas of the housings were in good shape, including the chrome light retaining rings. These just needed some buffing to bring back to life. The original rubber fittings on the housings served well, though they were quite tight, since the new wiring I inserted was slightly heftier than the original wires. The original wiring was pretty badly decayed, particularly the cotton loomed insulation on the two “hot” wires going to each headlight bulb. I used plastic coated wires, not cotton loomed wires.
The lights work, and it seems as though adding them returns a little bit of the car’s soul. Sure is nice to see them in place!
