Bonnet seam finishing
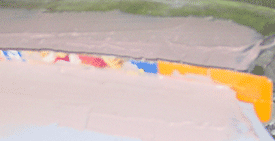
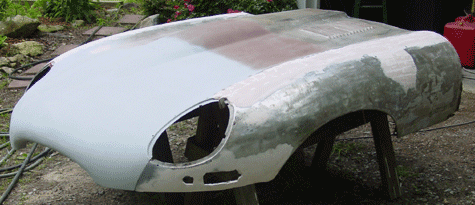
We repeated the cardboard trick that we used on the seams in the front of the bonnet. This time we concentrated on the seams that run from the headlight holes to the rear of the bonnet along the seam of the center section and the right and left wings. This seam is fitted with a chrome “bead” when the bonnet is complete.  The process is quite simple: You take thin cardboard (we used a cereal box) and insert it into the seam before you bolt the pieces. You need to cut holes or slots for the bolts, but these needn’t be exact. After you insert the cardboard, you should have about a centimeter or two of cardboard extending along the top of the seam. Then you apply body filler to the areas along both sides of the cardboard, which separates the body filler nicely. You can sand right across the cardboard, though it’s usually good to cut the cardboard close to the set body filler before you fire up your sander.
The point of this is to remove any ripples along the seam without disrupting the way that the two sections meet. Because you are smoothing the sections together, the seam is flawless. After you take the sections apart, you can do minor smoothing to the individual pieces.
We needed to do this smoothing because we had installed a new metal tab to the right wing of the bonnet, and the heat of welding made a few changes in the metal along the top of the wing. We had to do some pounding as well in order to stretch the wing back into the correct shape. The right wing flattened a bit along to seam. The left wing, however, required little work along the top.
 I realized today that this “bonnet” section of this restoration journal is perhaps a bit tedious, simply because it looks as though much the same thing is happening over and over again. And that perception is not entirely inaccurate. The repair of the bonnet at this point is pretty much the same thing repeated (almost) endlessly. It’s a big job because it’s in fact a big part of the entire restoration effort. Relative to the rest of the Jaguar E-type body, the bonnet takes up about one third of the volume. The surface area of the bonnet is quite large and mostly flat. Since it is large and flat, doing the final repairs is difficult and time consuming. You can tell when you take on bonnet repairs (especially repairs that were as extensive as ours) that the prices that new bonnets go for are not really extraordinary. They fall in line with what “real” repairs would cost, since a body shop would have to invest a lot of expensive time into repairs like what we have done. A new piece imported from England is probably cheaper.
It’s a question of doing the math. And the nice thing about the amateur restorer is that he or she doesn’t have a payroll to make while fixing the old Jag.
Between hammers and welds and bondo-slinging, I removed the bonnet latches from the inside of the bonnet. The right side latch will need some work. It looks as though it was a casualty of a bump or two. The left side latch was completely intact, and the rubber bumper is still surprisingly good. As a matter of fact the left wing as a whole is in better shape than the right. I also fabricated and spot welded a replacement part for the left wing — the attachment piece for the inside wing (one of the internal bonnet parts) that is welded behind the wheel arch and runs vertically up the wing. I’ll take a picture later to whow where this piece is located.
I’ve been thinking that perhaps I should not update the online journal until the bonnet actually looks significantly different, since the pictures are looking too much alike. The nice thing about this: I think the bonnet will look significantly different in about a week.